Embedded Signup for WhatsApp Business API
Refer https://developers.facebook.com/docs/whatsapp/embedded-signup/ for details
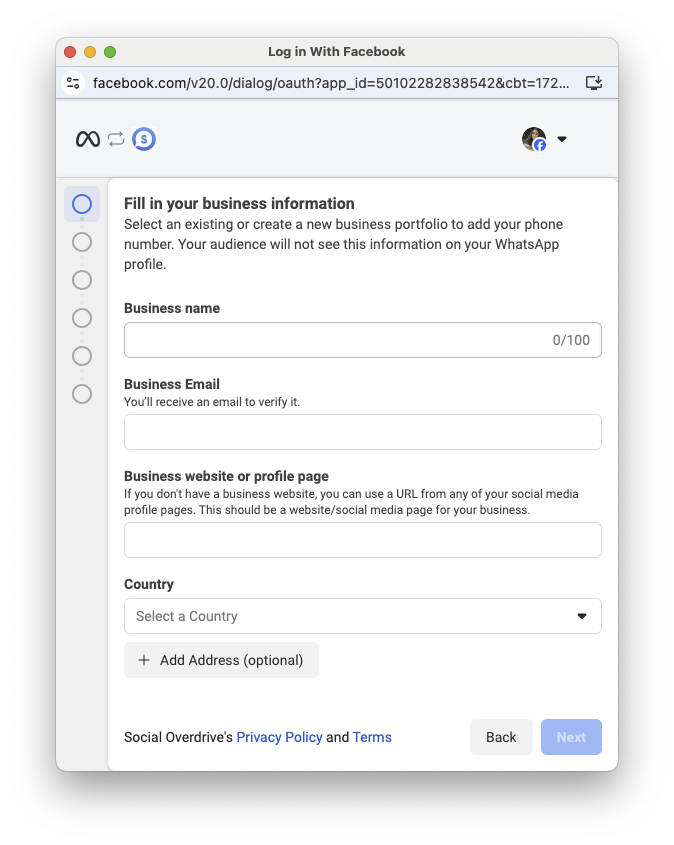

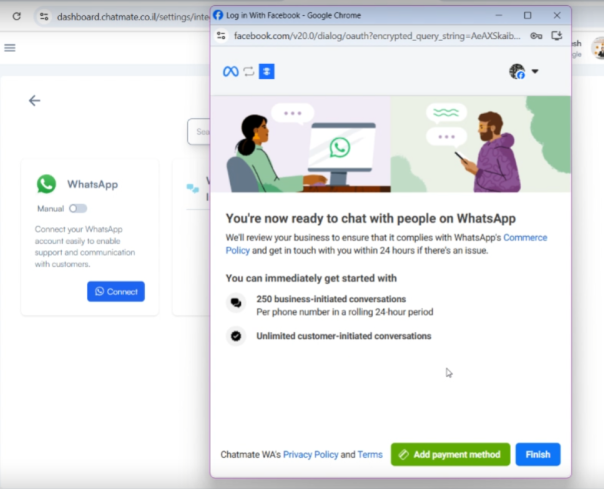
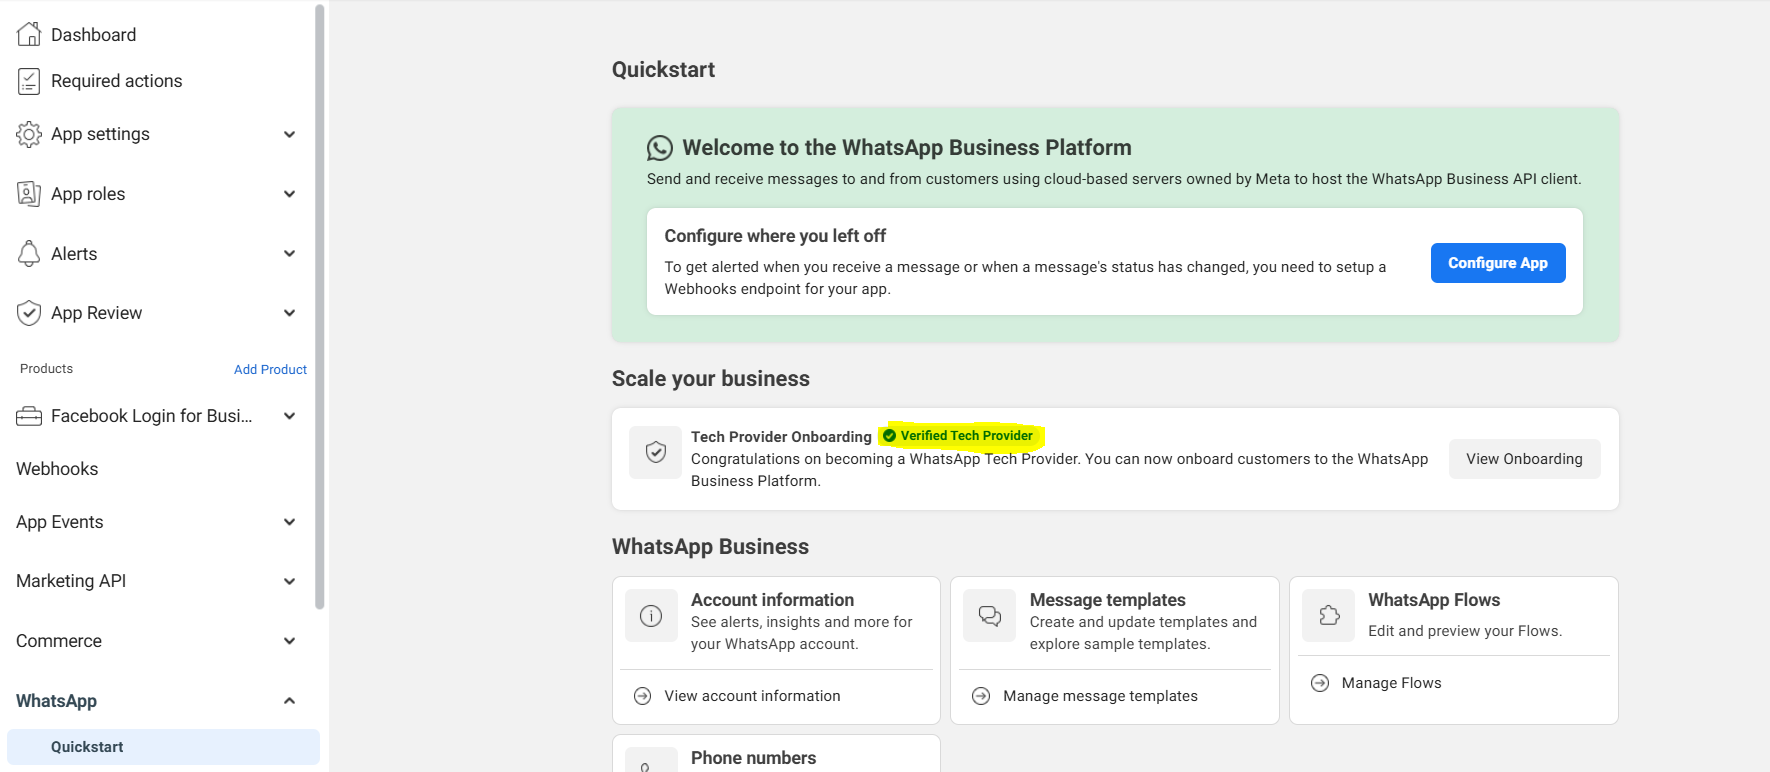
Once your App verification is complete and you receive the verified tech provider badge, lets us move to build the Embedded Signup
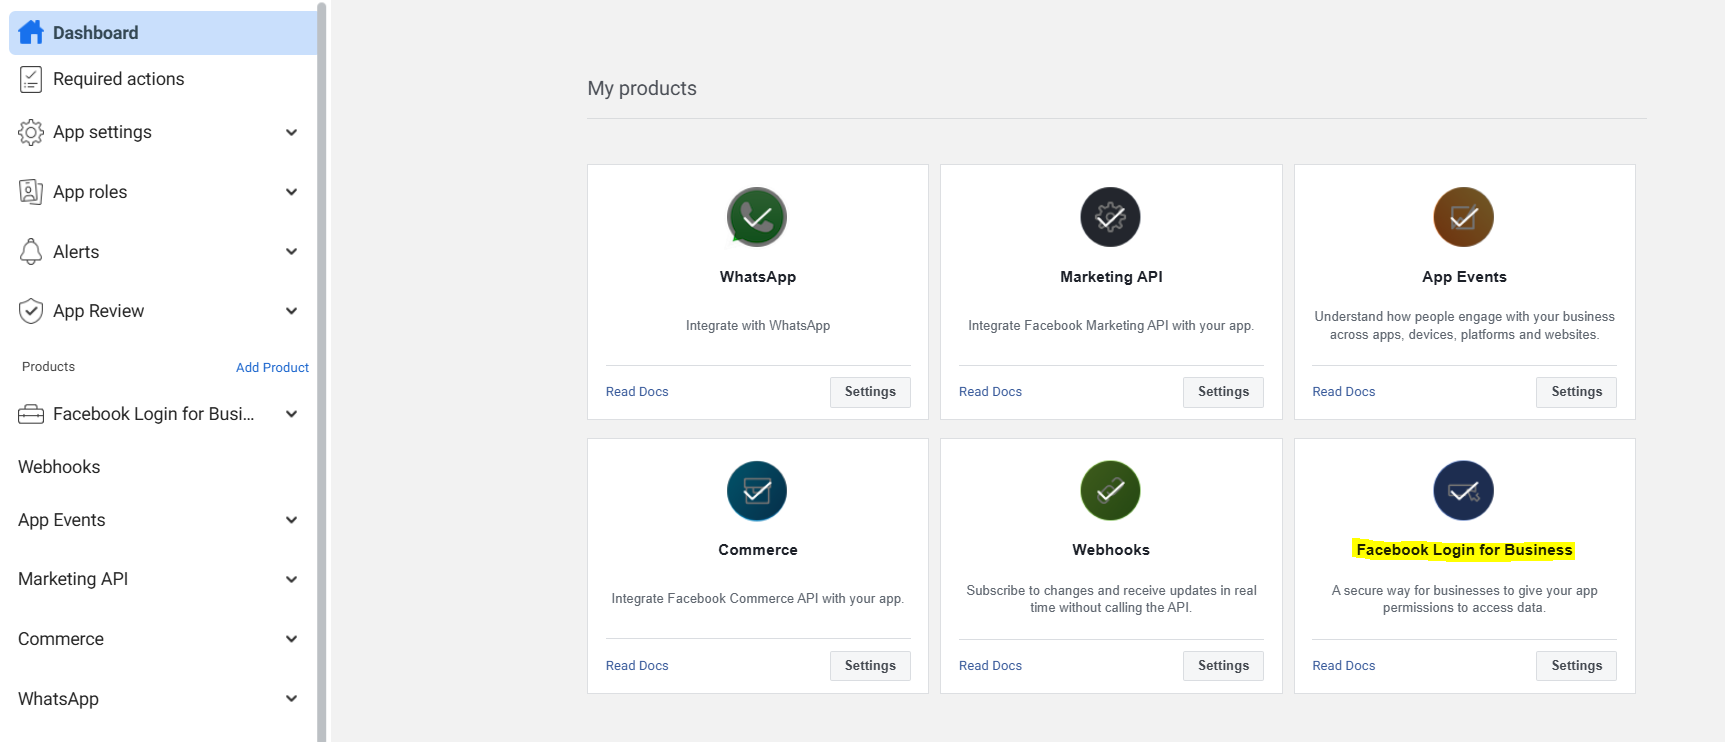
Ensure you have Facebook Login for Business enabled in your app, if not click on Dashboard and enable it
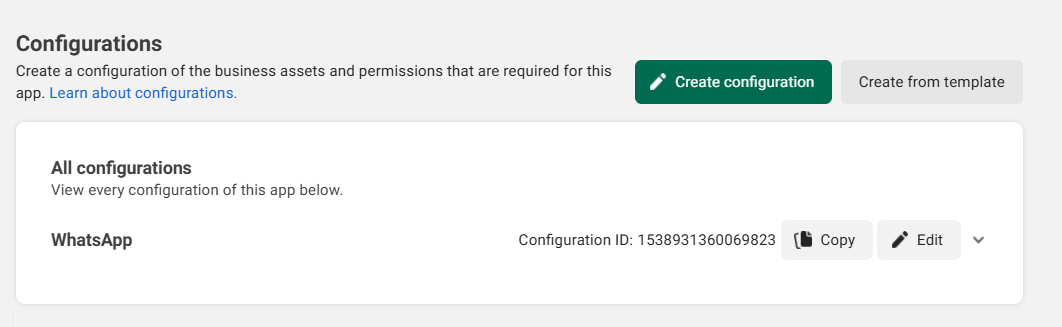
Head to Facebook Login for Business and select Configurations -> Create configuration
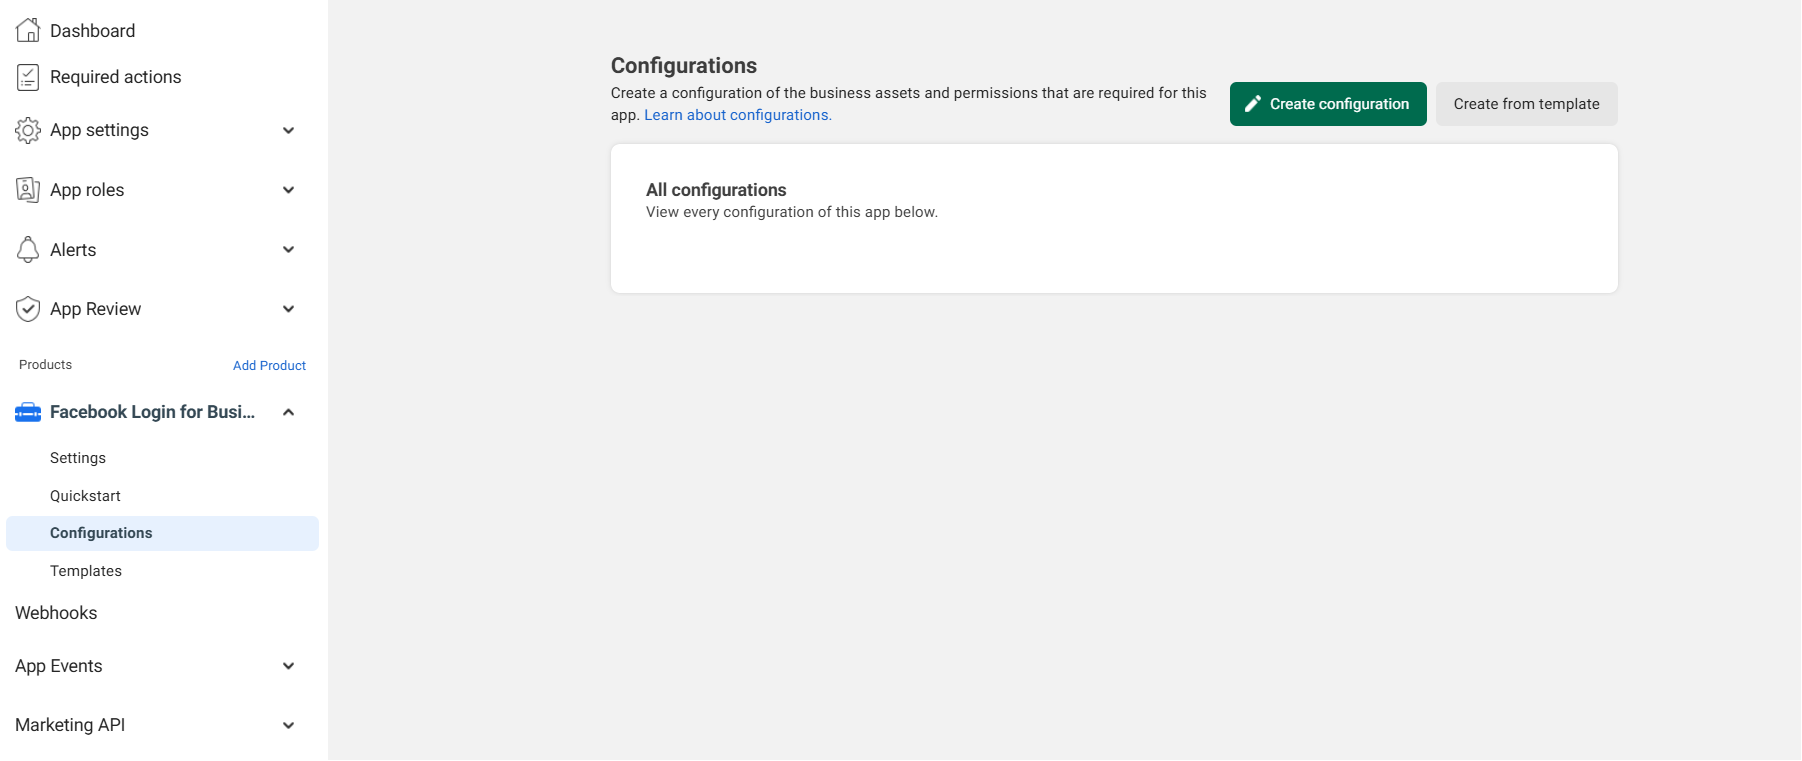
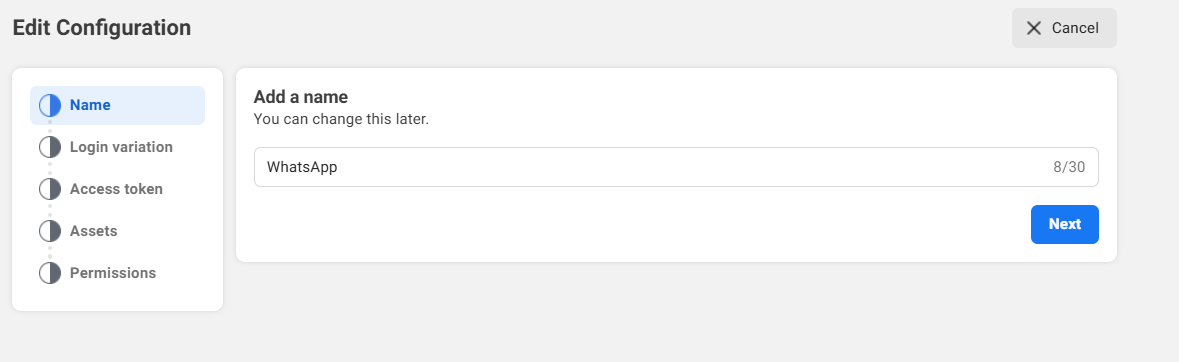
Add a Name to the configuration
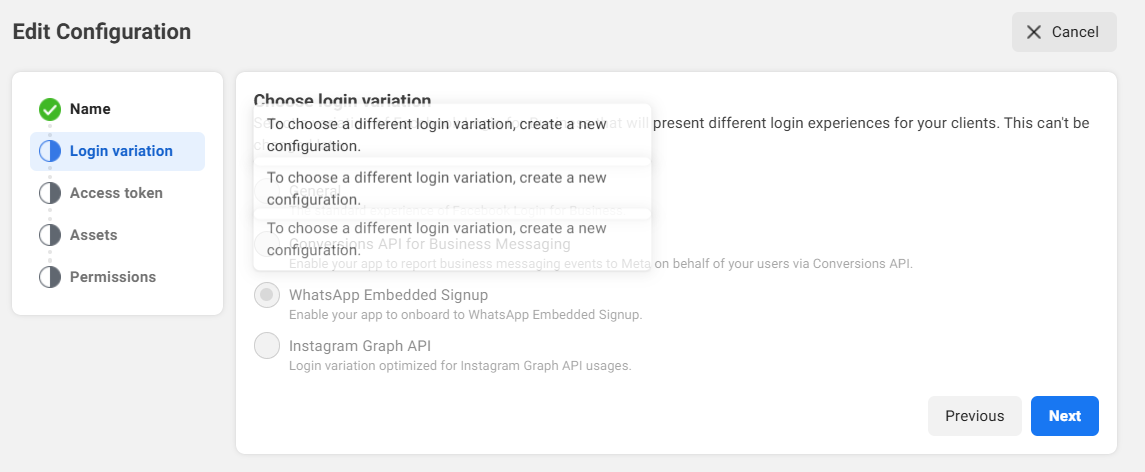
Select Login variation as WhatsApp Embedded Signup
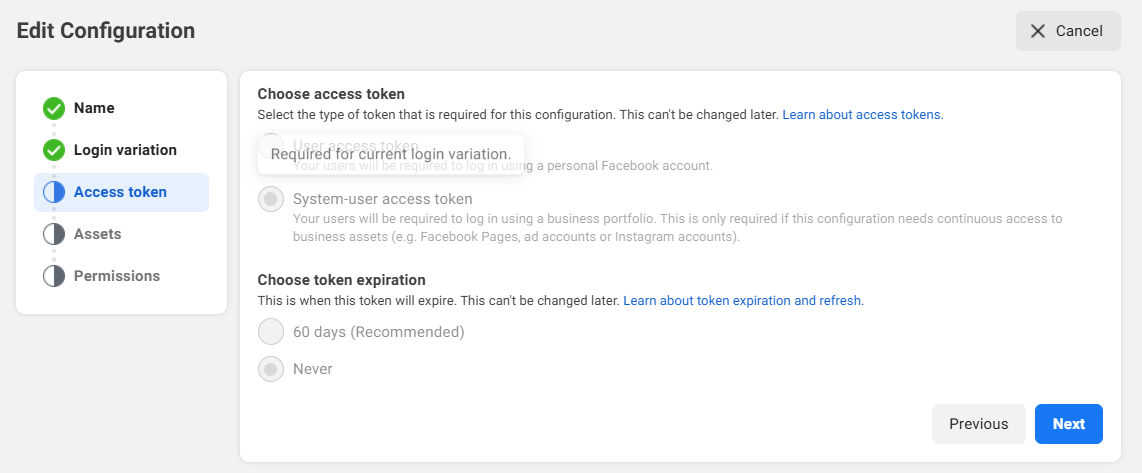
Select System-user Access Token & Never Expire
Select WhatsApp Accounts and Select all Asset Task Permissions
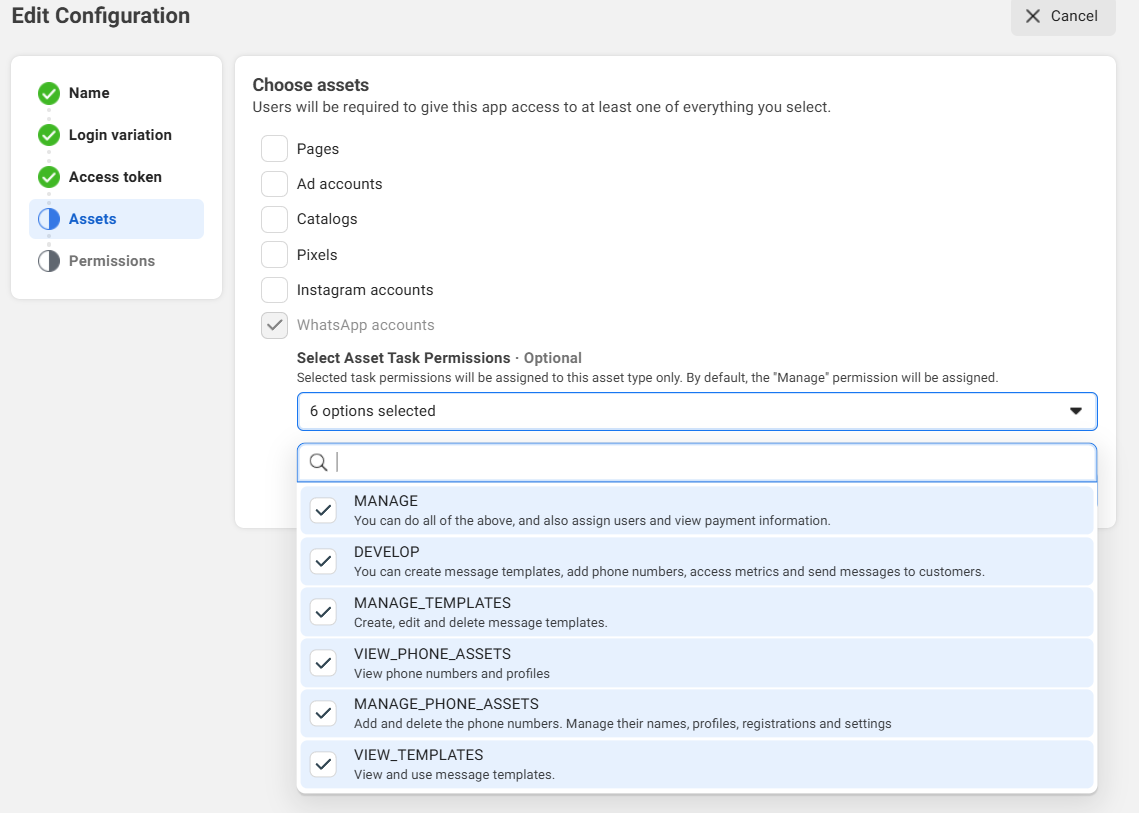
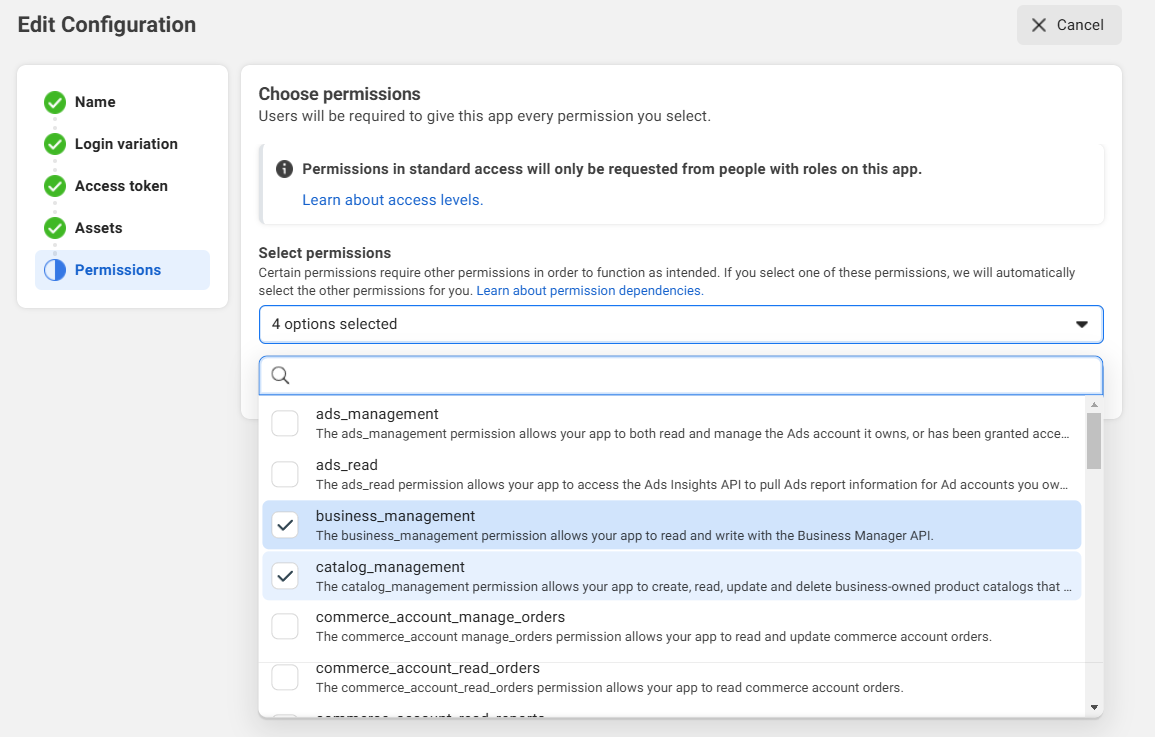
From Permssions select business_management, catalog_management, whataspp_business_management & whatsapp_business_messaggng
click Save to save the configuration
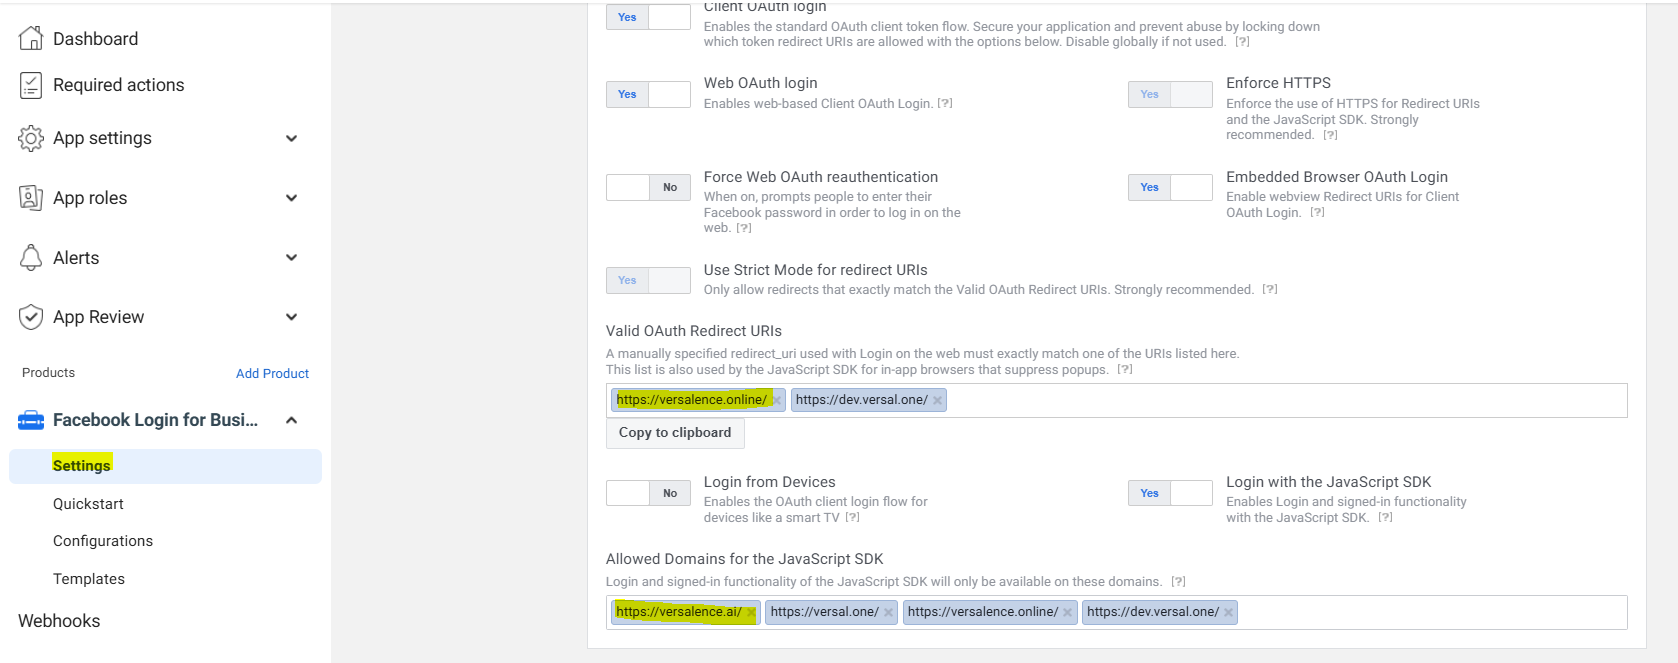
To whitelist the domains, head to settings and add the domains and ensure to enable Client OAuth Login, Web OAuth Login, Embedded Browser OAuth Login
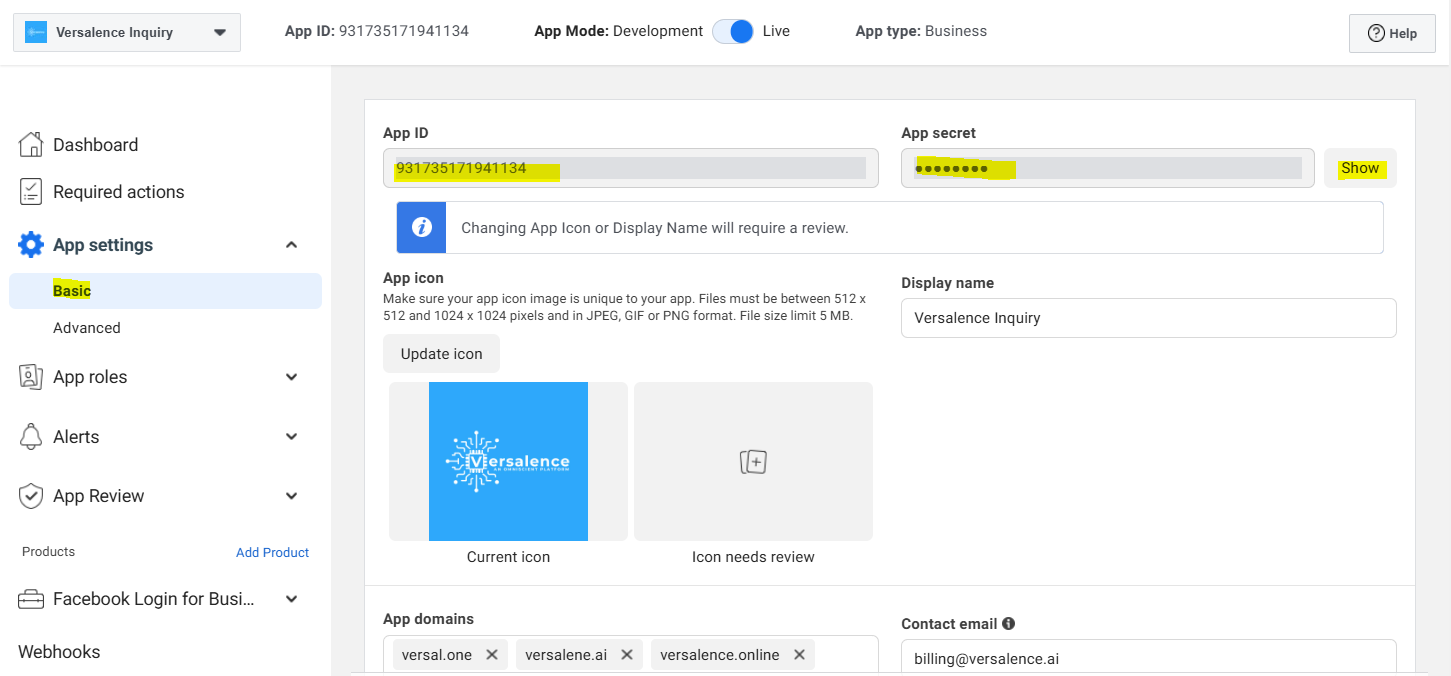
Finally to embed the code you will need
- Configuration ID
- App ID
- App Secret
Configuration ID from the screen above. App ID and App secret from the screen below
Onboarding business customers as a Tech Provider or Tech Partner
This document describes the steps Tech Providers and Tech Partners must perform to onboard new business customers who have completed the Embedded Signup flow.
If you are a Tech Provider or Tech Partner, any business customer who completes your implementantation of the Embedded Signup flow will not be able to use your app to access their WhatsApp assets or send and receive messages (if you are offering messaging services) until you complete these steps.
What you will need
- the business customer's WABA ID (returned via session logging or API request)
- the business customer's business phone number ID (returned via session logging or API request)
- your app ID (displayed at the top of the App Dashboard)
- your app secret (displayed in the App Dashboard > App settings > Basic panel)
Also, if you wish to test messaging capabilities using the customer's business phone number, you will need a WhatsApp phone number that can already send and receive messages from other WhatsApp numbers.
Perform all of the requests described below using server-to-server requests. Do not use client-side requests.
Step 1: Exchange the token code for a business token
Use the GET /oauth/access_token endpoint to exchange the token code returned by Embedded Signup for a business integration system user access token ("business token").
Request
curl --get 'https://graph.facebook.com/v21.0/oauth/access_token' \
-d 'client_id=<APP_ID>' \
-d 'client_secret=<APP_SECRET>' \
-d 'code=<CODE>'
Request parameters
| Placeholder | Description | Example value |
|---|---|---|
|
|
Required. Your app ID. This is displayed at the top of the App Dashboard. |
|
|
|
Required. Your app secret. You can get this from the App Dashboard > App Secret > Basic panel. |
|
|
|
Required. The code returned by Embedded Signup when the customer successfully completed the flow. |
|
Response
Upon success:
<BUSINESS_TOKEN>
Response parameters
| Placeholder | Description | Example value |
|---|---|---|
|
|
The customer's business token. |
|
Step 2: Subscribe to webhooks on the customer's WABA
Use the POST /<WABA_ID>/subscribed_apps endpoint to subscribe your app to webhooks on the business customer's WABA. If you want the customer's webhooks to be sent to a different callback URL than the one set on your app, you have multiple webhook override options.
Request
curl -X POST 'https://graph.facebook.com/<API_VERSION>/<WABA_ID>/subscribed_apps' \
-H 'Authorization: Bearer <BUSINESS_TOKEN>'
Request parameters
| Placeholder | Description | Example value |
|---|---|---|
|
|
Required. The customer's business token. |
|
|
|
Required. The customer's WABA ID. |
|
Response
Upon success:
{
  "success": true
}
Step 3: Register the customer's phone number
Use the POST /<BUSINESS_PHONE_NUMBER_ID>/register endpoint to register the customer's business phone number for use with Cloud API.
Request
curl 'https://graph.facebook.com/v21.0/<BUSINESS_PHONE_NUMBER_ID>/register' \
-H 'Content-Type: application/json' \
-H 'Authorization: Bearer <BUSINESS_TOKEN>' \
-d '
{
  "messaging_product": "whatsapp",
  "pin": "<DESIRED_PIN>"
}'
Request parameters
| Placeholder | Description | Example value |
|---|---|---|
|
|
Required. The customer's business phone number ID returned. |
|
|
|
Required. The customer's business token. |
|
|
|
Required. Set this value to a 6-digit number. This will be the business phone number's two-step verification PIN. |
|
Response
Upon success:
{
  "success": true
}
Step 4: Send a test message
This step is optional.
If you wish to test the messaging capabilities of your business customer's business phone number, send a message to the customer's number from your own WhatsApp number (this will open a customer service window, allowing you to respond with any type of message).
Next, use the POST /<BUSINESS_PHONE_NUMBER_ID>/messages endpoint to send a text message in response.
Request
curl 'https://graph.facebook.com/v21.0/<BUSINESS_PHONE_NUMBER_ID>/messages' \
-H 'Content-Type: application/json' \
-H 'Authorization: Bearer <BUSINESS_TOKEN>' \
-d '
{
  "messaging_product": "whatsapp",
  "recipient_type": "individual",
  "to": "<WHATSAPP_USER_NUMBER>",
  "type": "text",
  "text": {
    "body": "<BODY_TEXT>"
  }
}'
Request parameters
| Placeholder | Description | Example value |
|---|---|---|
|
|
Required. Message body text. Supports URLs. Maximum 4096 characters. |
|
|
|
Required. The customer's business phone number ID. |
|
|
|
Reqiured. The customer's business token. |
|
|
|
Required. Your WhatsApp phone number that can send and receive messages from other WhatsApp numbers. Note that this cannot be a business phone number already registered for use with Cloud API or On-Premises API. |
|
Response
Upon success:
{
  "messaging_product": "whatsapp",
  "contacts": [
    {
      "input": "<WHATSAPP_USER_NUMBER>",
      "wa_id": "<WHATSAPP_USER_ID>"
    }
  ],
  "messages": [
    {
      "id": "<WHATSAPP_MESSAGE_ID>"
    }
  ]
}
Response parameters
| Placeholder | Description | Example value |
|---|---|---|
|
|
WhatsApp message ID. |
|
|
|
Your WhatsApp user ID. |
|
|
|
Your WhatsApp phone number that the message was sent to. |
|
If you were able to successfully send and receive messages using the customer's business phone number, and if messages webhooks were triggered describing the initial message that you sent, as well as the delivery statuses of the message you sent in response, the customer's business phone number is working properly.
Step 5: Instruct the customer to add a payment method
Instruct your customer to use the WhatsApp Manager to add a payment method. You can provide them with the following Help Center link:
https://www.facebook.com/business/help/488291839463771
Alternatively, you can instruct them to:
- Access the WhatsApp Manager > Overview panel at https://business.facebook.com/wa/manage/home/
- Click the Add payment method button
- Complete the flow
Once your customer adds a payment method, they are fully onboarded onto the WhatsApp Business Platform and can begin using your app to access their WhatsApp assets and send and receive messages (if you are providing them with that service).
No Comments