- WhatsApp API setup using developer portal
- Embedded Signup for WhatsApp Business API
- WhatsApp API Calls - Inbound
WhatsApp API setup using developer portal
Step 1: App Creation on Facebook
1.1 Visit the Developer Portal:
Ahoy, captain! Time to set sail for the mystical realm of Facebook’s Developer Island. Grab your digital compass and navigate to the treasure trove at developers.facebook.com. If you haven’t already donned your developer hat, now’s the perfect time to log in and join the adventure! 🏴☠️💻✨
1.2 Create a New App:
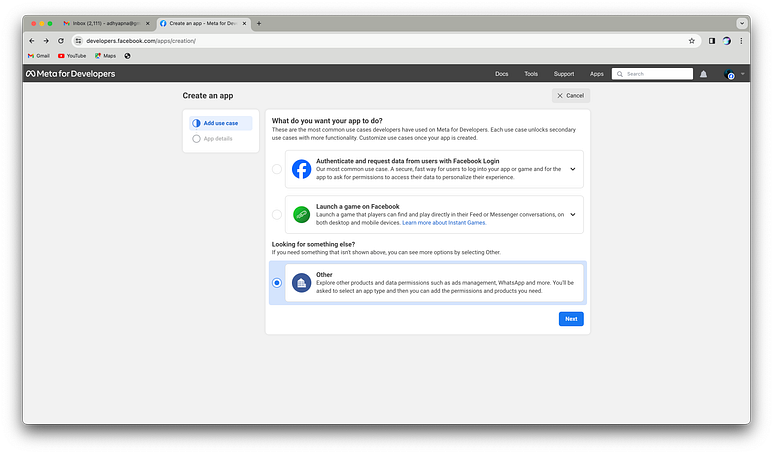
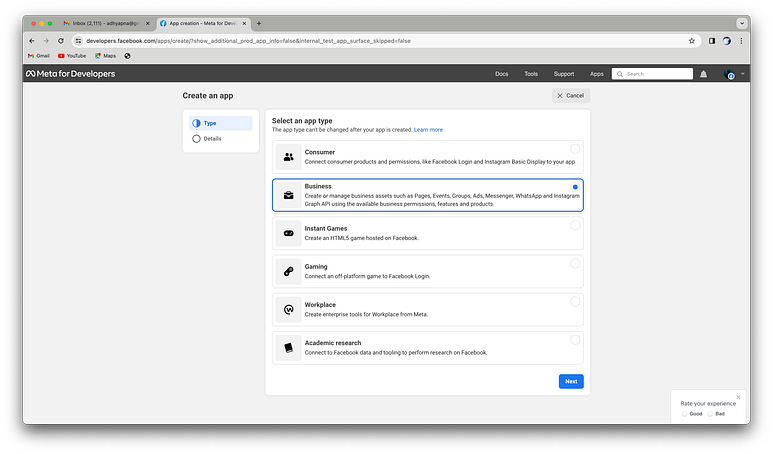
Select Business and click Next.
Fill app name and select business account(optional).
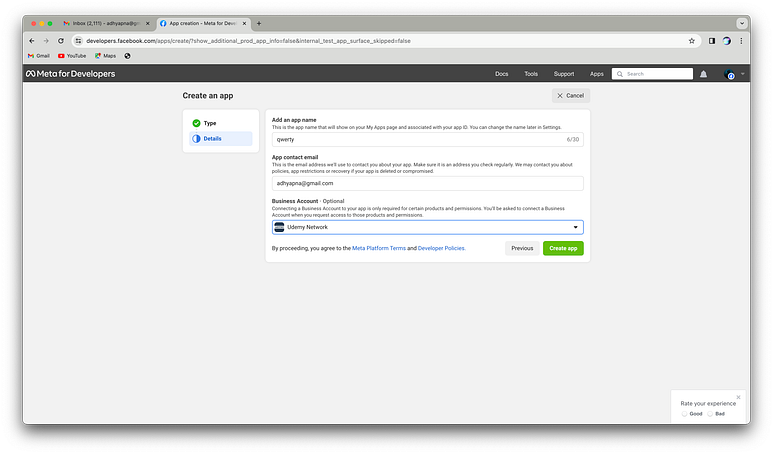
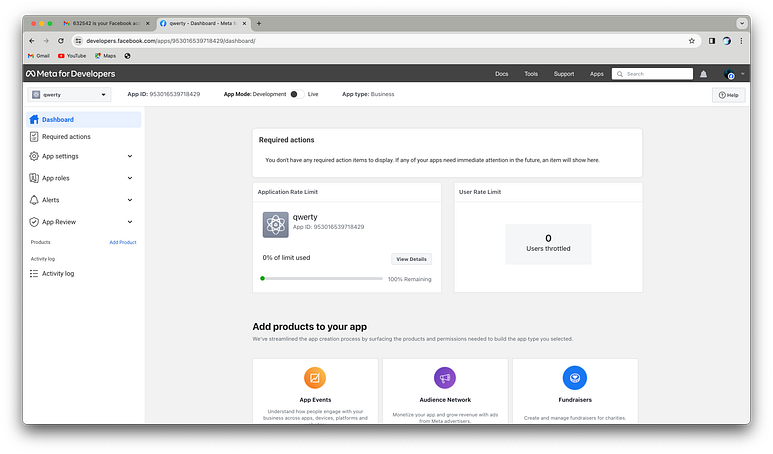
On clicking Create app you will be redirected to dashboard of created app.
1.3 Configure App Settings:
Configure the basic settings for your app, including privacy policy URL, terms of service URL, and app category.
1.4 Obtain App ID and Secret:
Once your app is created, navigate to the dashboard to find your App ID and App Secret. These credentials are crucial for integrating your app with WhatsApp.
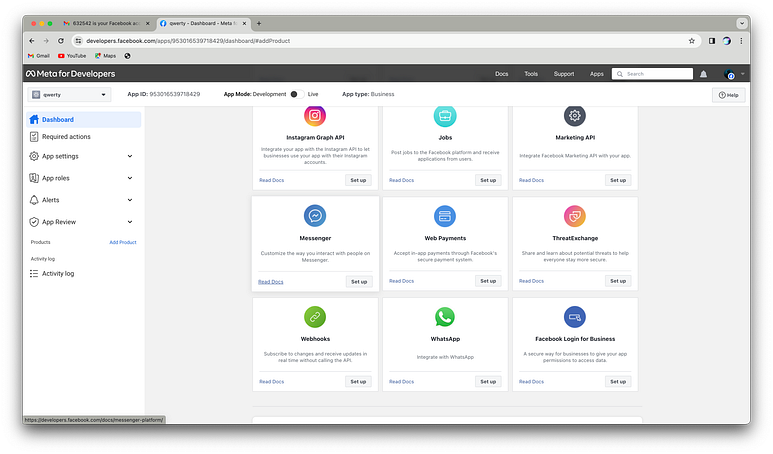
Step 2: Adding WhatsApp Products to App
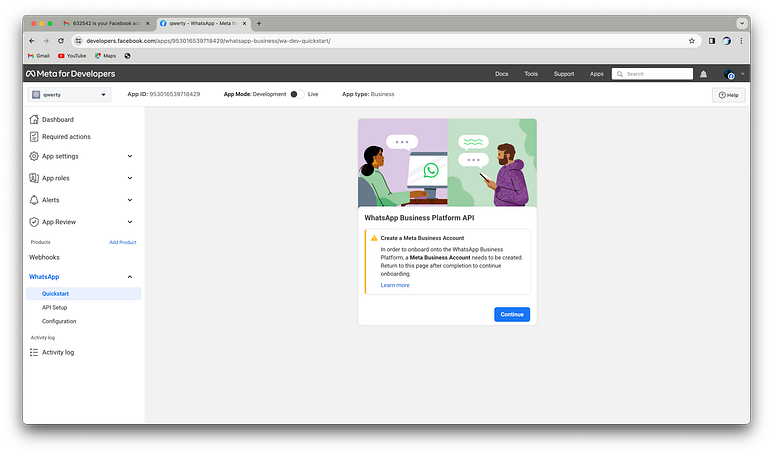
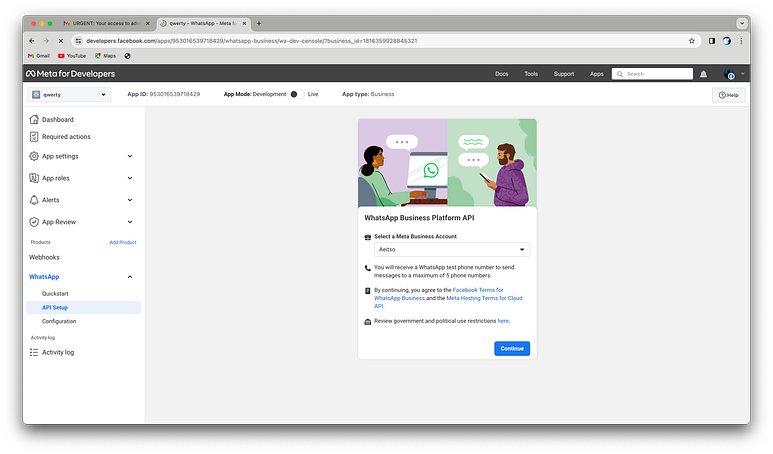
Ah, a minor hiccup! To proceed with the setup, we’ll need to create a Meta Business Account. Let’s swiftly click on “Continue” and tackle this hurdle head-on.
With a click of “Continue,” we find ourselves whisked away to the Meta Business Portal, where a friendly invitation awaits to create our account. It’s time to embark on this new journey, so let’s dive in and get started with setting up our Meta Business Account.
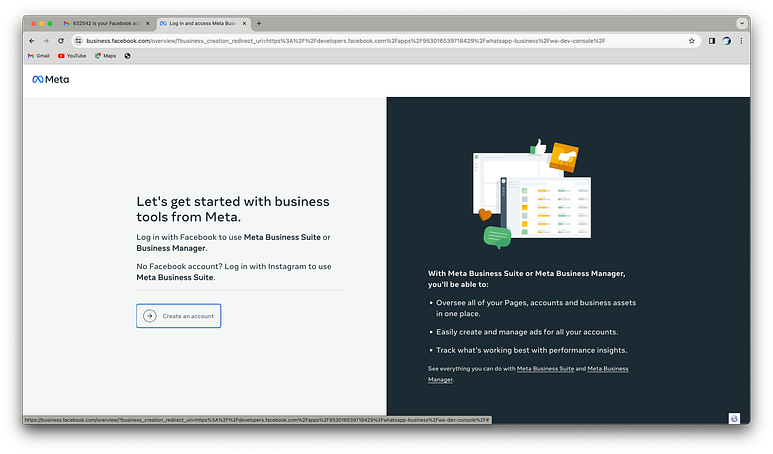
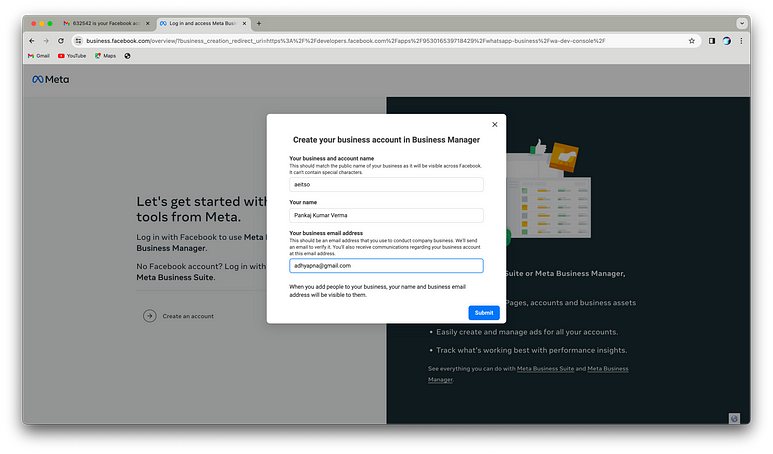
Now, channeling your inner maestro, click on “Create Account” and orchestrate the symphony of details — give your business a name, grace the stage with your own, and let the crescendo be your business email. Bravo, maestro, the performance of creating a Meta Business Account is about to begin! 🎵🎭✨
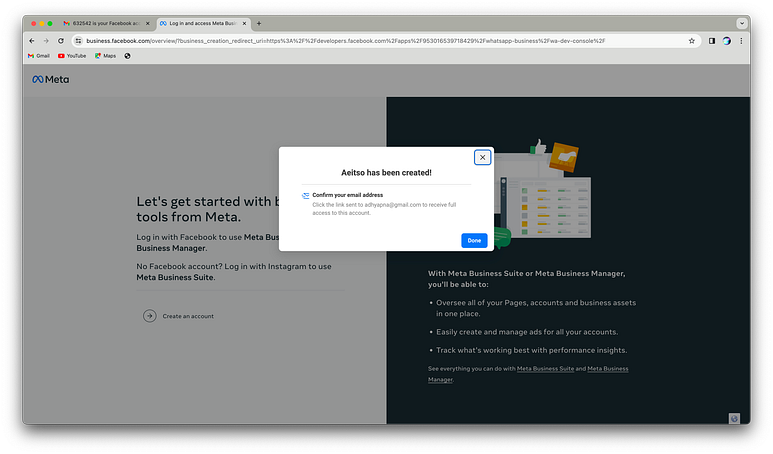
Huzzah! Your account has been birthed into the digital cosmos. Venture forth now, brave soul, to your inbox sanctuary. Confirm the rites of passage via email and return triumphantly to this realm. Click “Done” when your quest is complete, and let the adventures in the Meta Business Portal begin! 🚀📧🏰
With a victorious click of “Done,” behold as the digital gates of the Developer Portal swing wide open, welcoming you back with open arms. Now, let’s press on bravely! Click “Continue” to resume our noble quest of integrating the WhatsApp product into your app. Onward, fellow traveler, for the realm of communication awaits! 🛡️🔮📱
Upon clicking “Continue,” the API Setup page for WhatsApp unveils itself. Here, amidst the digital tapestry, let’s weave the threads of integration, setting the stage for a symphony of seamless communication in just a few swift configurations. Get ready, for our app is on the brink of becoming a digital maestro! 🎉📱🎶
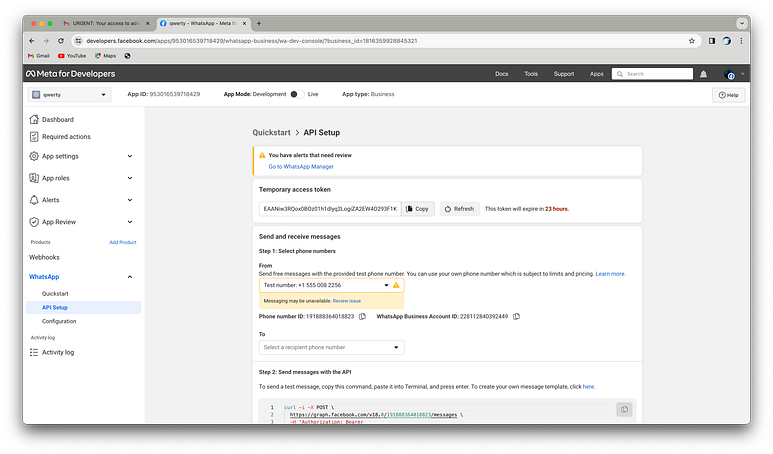
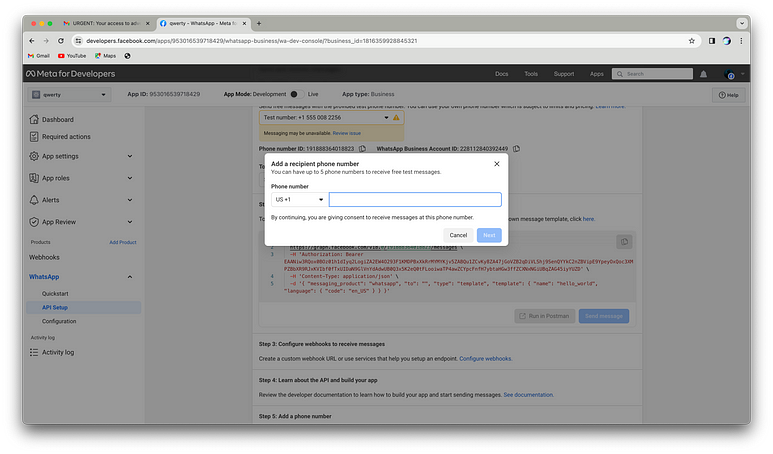
Now, let’s inject a touch of practical magic — add a recipient phone number to test the WhatsApp API with a temporary token. Watch as our digital creation takes its first steps into the world of communication enchantment! 🌐📱✨
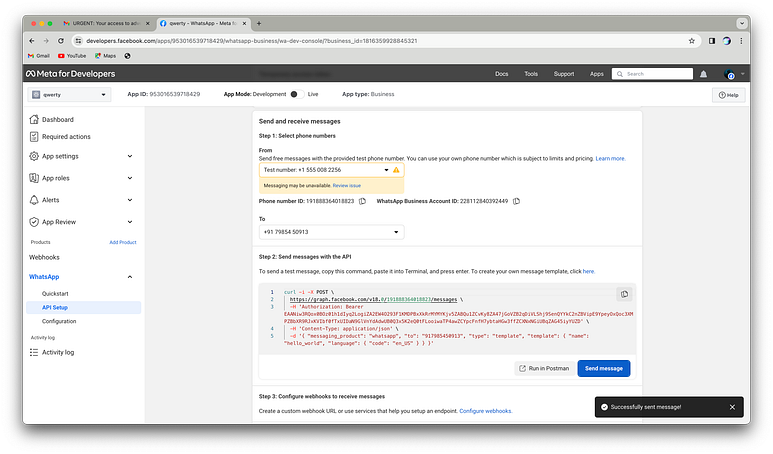
With a click of “Send Message,” anticipate the delightful appearance of a bottom-right toaster, announcing the triumph of our communication endeavor. As if by magic, a testing message shall materialize on WhatsApp, confirming the success of our integration. Behold the wonders of modern sorcery! 🪄📲🎉
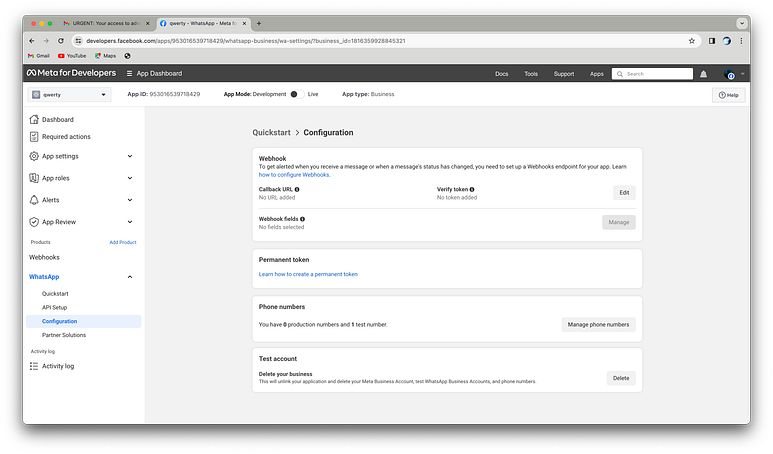
Ah, onto the next chapter of our adventure! Navigate to the configuration section where the path to glory awaits. Here, we must set up a webhook endpoint to receive crucial events, like messages from eager souls. Additionally, let’s forge a permanent token to solidify our presence in this digital realm. Onward, brave soul, for the journey continues! 🛠️🔗🌟
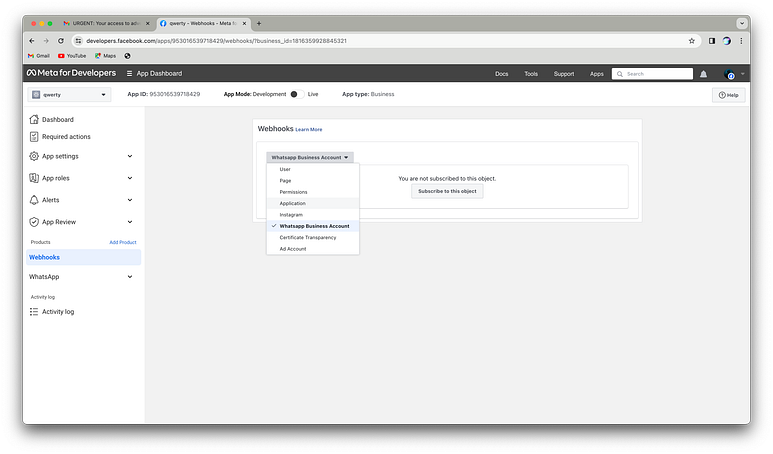
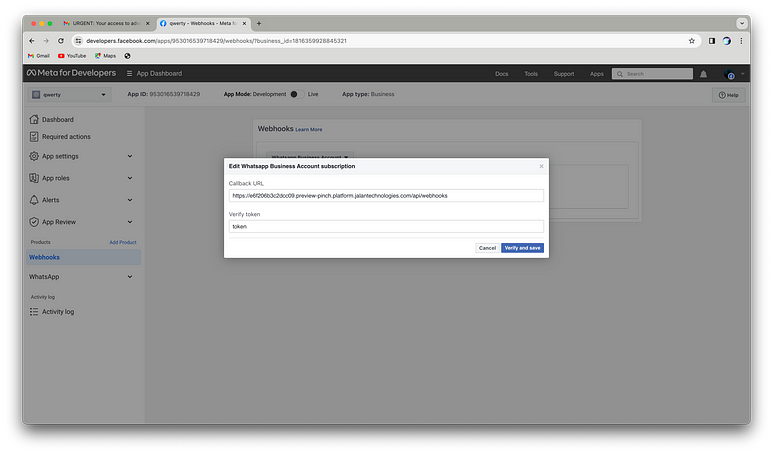
Proceed to the webhooks section and set your sights on the WhatsApp Business Account option. Here, amidst the digital crossroads, we shall forge the link that binds our app to the vibrant tapestry of WhatsApp communication. Embrace the power of connection as we embark on this pivotal step of our journey! 🌐📲🔗
In this digital rendezvous, input your webhook and token like a secret code, then embark on the quest to click “Verify and Save.” Watch as the magic unfolds, sealing the connection between our webhook, token, and the vast WhatsApp realms. Ready yourself for a triumphant salute, for our integration journey takes another leap forward! 🚀🌐🧙♂️
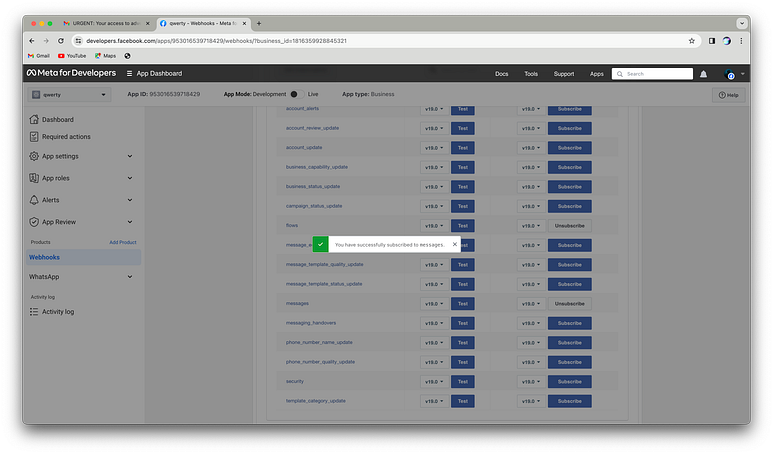
Once your app achieves verification status, you gain access to a plethora of object fields that your webhook can subscribe to. Each field offers the option to both test and subscribe, empowering you to fine-tune your integration and tailor it to your specific needs. It’s time to explore, experiment, and unlock the full potential of your WhatsApp Business API integration! 🚀🌐📲
For assistance in creating your webhook, I recommend visiting the official documentation provided by WhatsApp Business API. They offer comprehensive guidance on how to set up webhooks, ensuring seamless integration with their platform. Simply follow the link provided: How to Use Webhooks from WhatsApp Business API
There, you’ll find detailed instructions and best practices to help you navigate the process successfully. 🛠️🌐📲
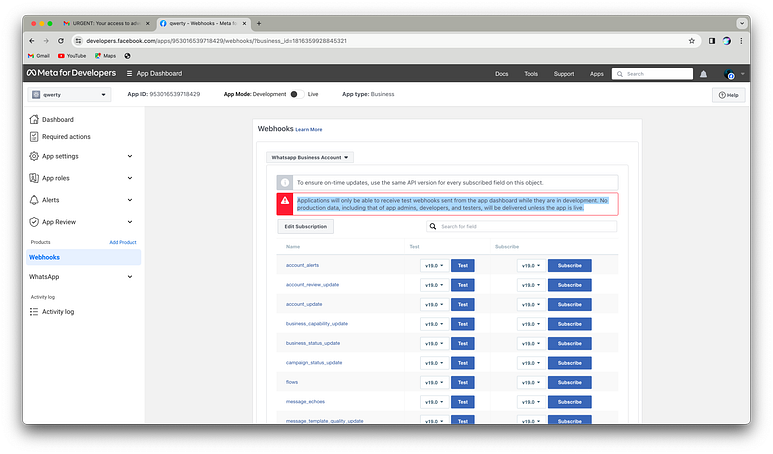
As indicated by the red alert in the image above, to receive logs, it’s imperative to transition your app from a testing environment to a live one. This pivotal step ensures that your app is fully operational and ready to receive and process logs effectively. Prepare to elevate your app’s status and unleash its full potential upon the digital landscape! 🚀🔴📊
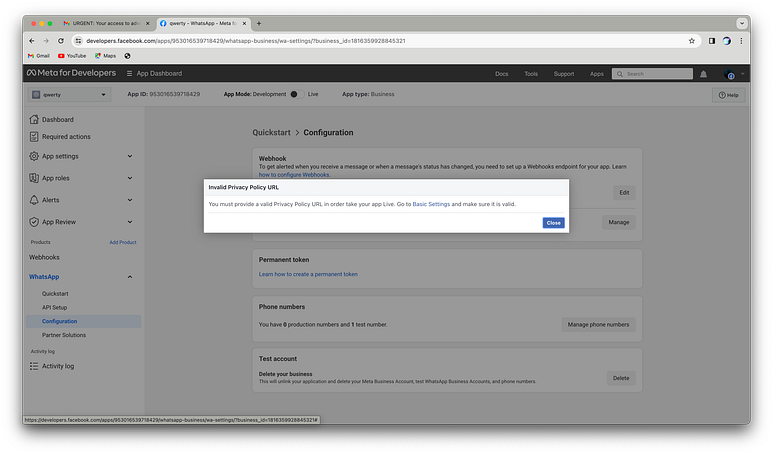
Upon toggling the switch to go live, a new frontier unveils itself, beckoning you to fill in basic details like a trailblazing explorer. Arm yourself with a Privacy Policy and Terms of Service URL — the compass and map of the digital wilderness. Ready your details, and let’s pave the way for your app to venture boldly into the live realm! 🌐🔒🚀
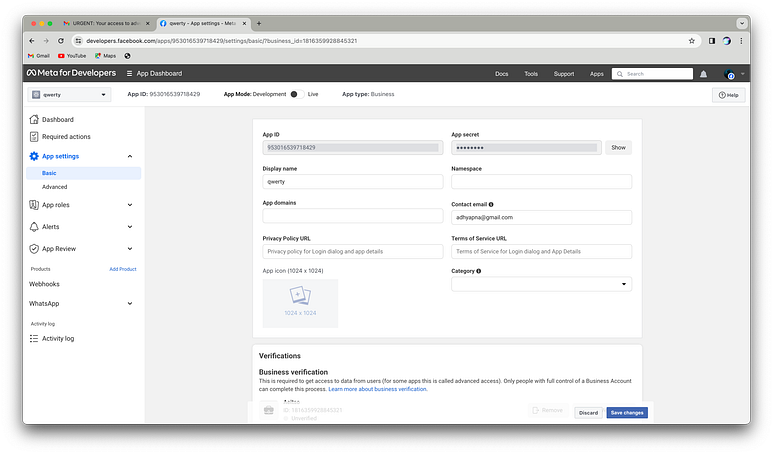
Ah, the plot thickens! While you’ve gained the ability to receive logs and send template-based interactive messages, the coveted feature of Meta’s latest innovation, Flow, remains just beyond reach. Fear not, for the key to unlocking this treasure trove lies in verifying your business. Prepare to embark on the final leg of this epic journey, where the rewards of verification await! 🌟🔒🔑
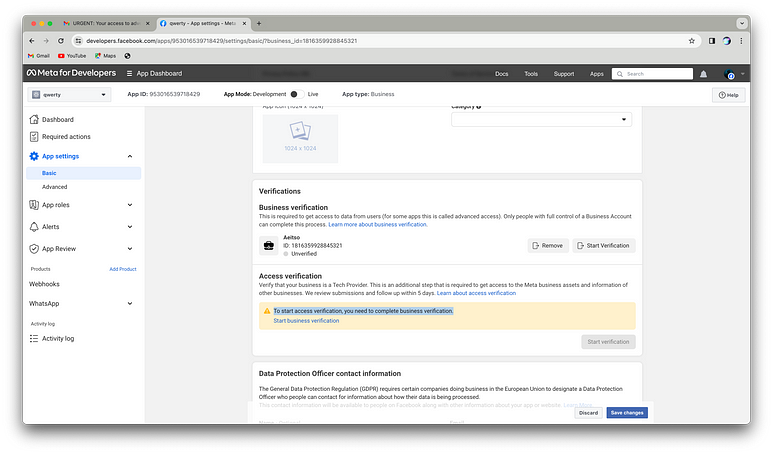
With a click on “Start Verification,” prepare for a seamless transition as you’re whisked away to the Meta Business Portal. Here, amidst the digital corridors, you’ll embark on the noble quest to verify your business, unlocking a world of possibilities for your app’s integration journey. Ready yourself, adventurer, for the path to verification awaits! 🚀🏰🔍
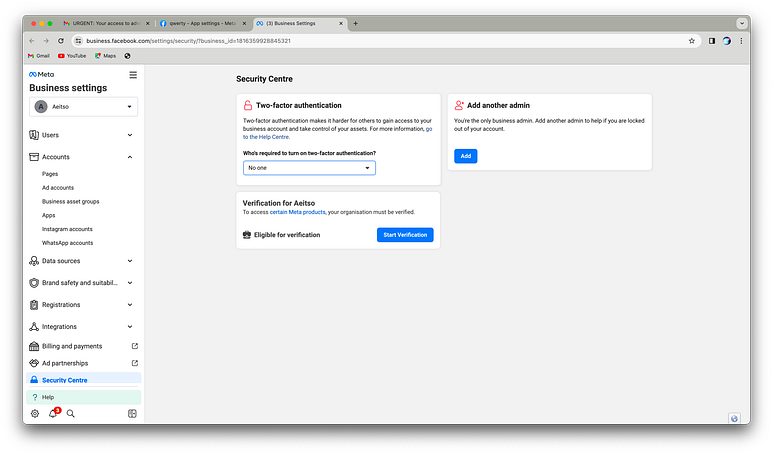
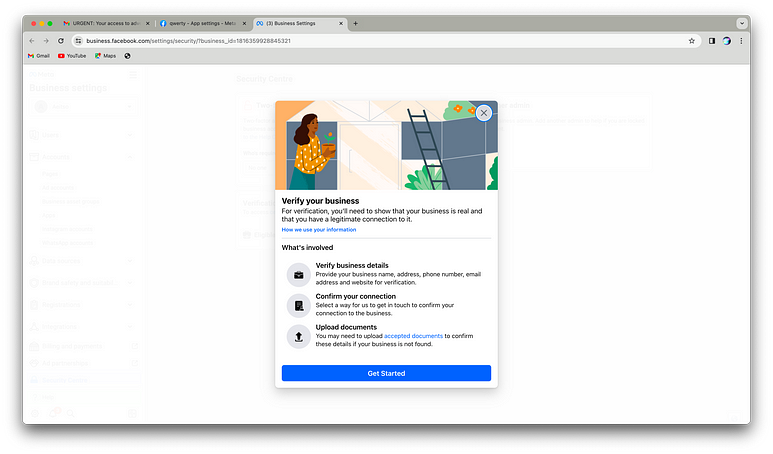
To verify your business, prepare to provide essential details, including connections such as the founder or CEO’s profile and relevant documents. Upload these documents as instructed. If all proceeds smoothly, anticipate your business verification within a swift timeframe of 2–4 hours, with a maximum duration of 48 hours. Ready your documents and embark on this final step toward unlocking the full potential of your business integration! 📄🔐🕒
Congratulations, trailblazer! You’ve triumphed through the entire saga — from crafting Meta and integrating WhatsApp products to birthing a business account, configuring webhooks, setting your app live, and finally, attaining the illustrious verification for your business.
Embedded Signup for WhatsApp Business API
Refer https://developers.facebook.com/docs/whatsapp/embedded-signup/ for details
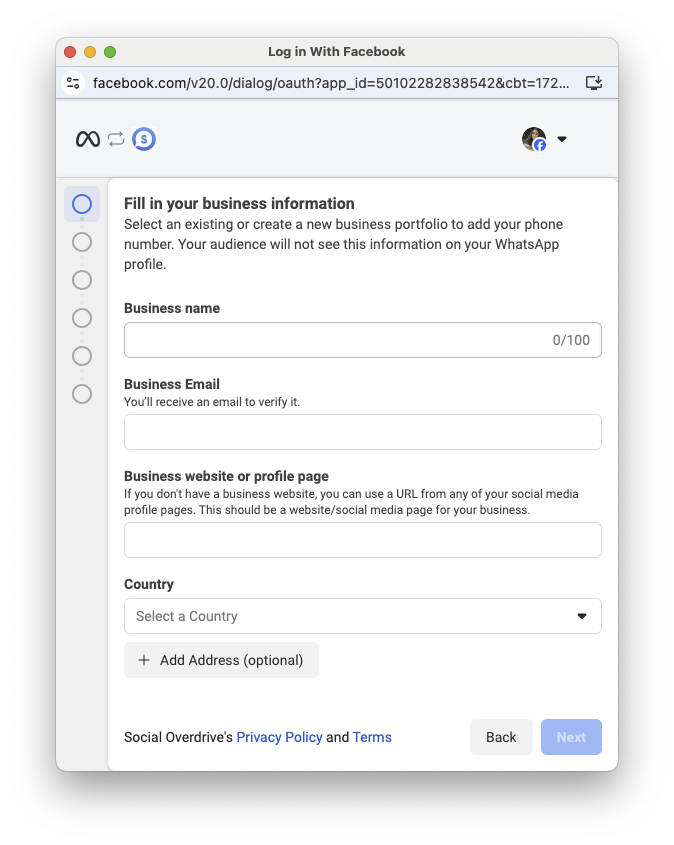

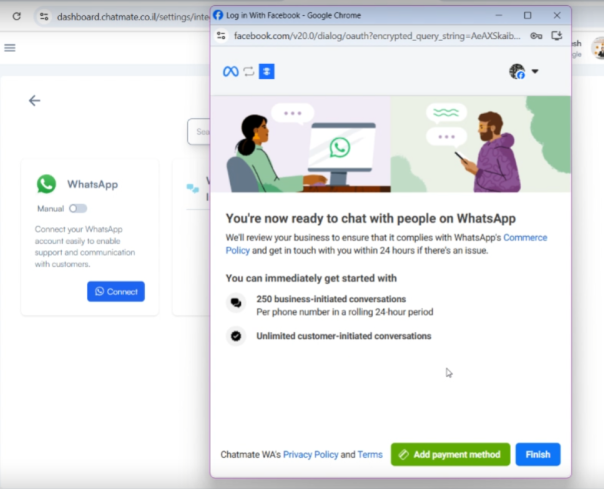
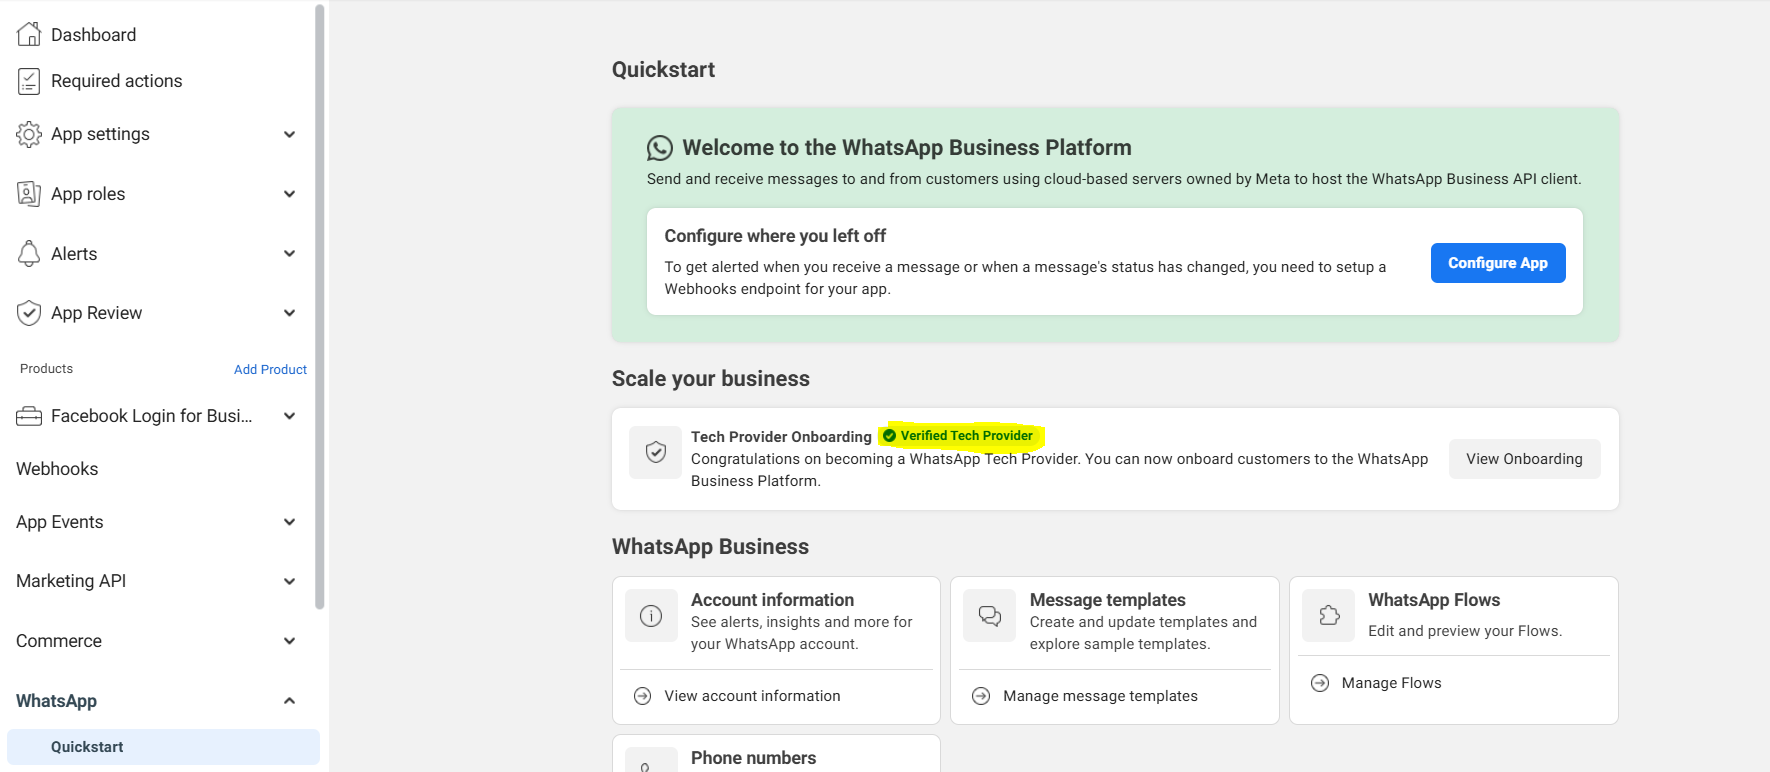
Once your App verification is complete and you receive the verified tech provider badge, lets us move to build the Embedded Signup
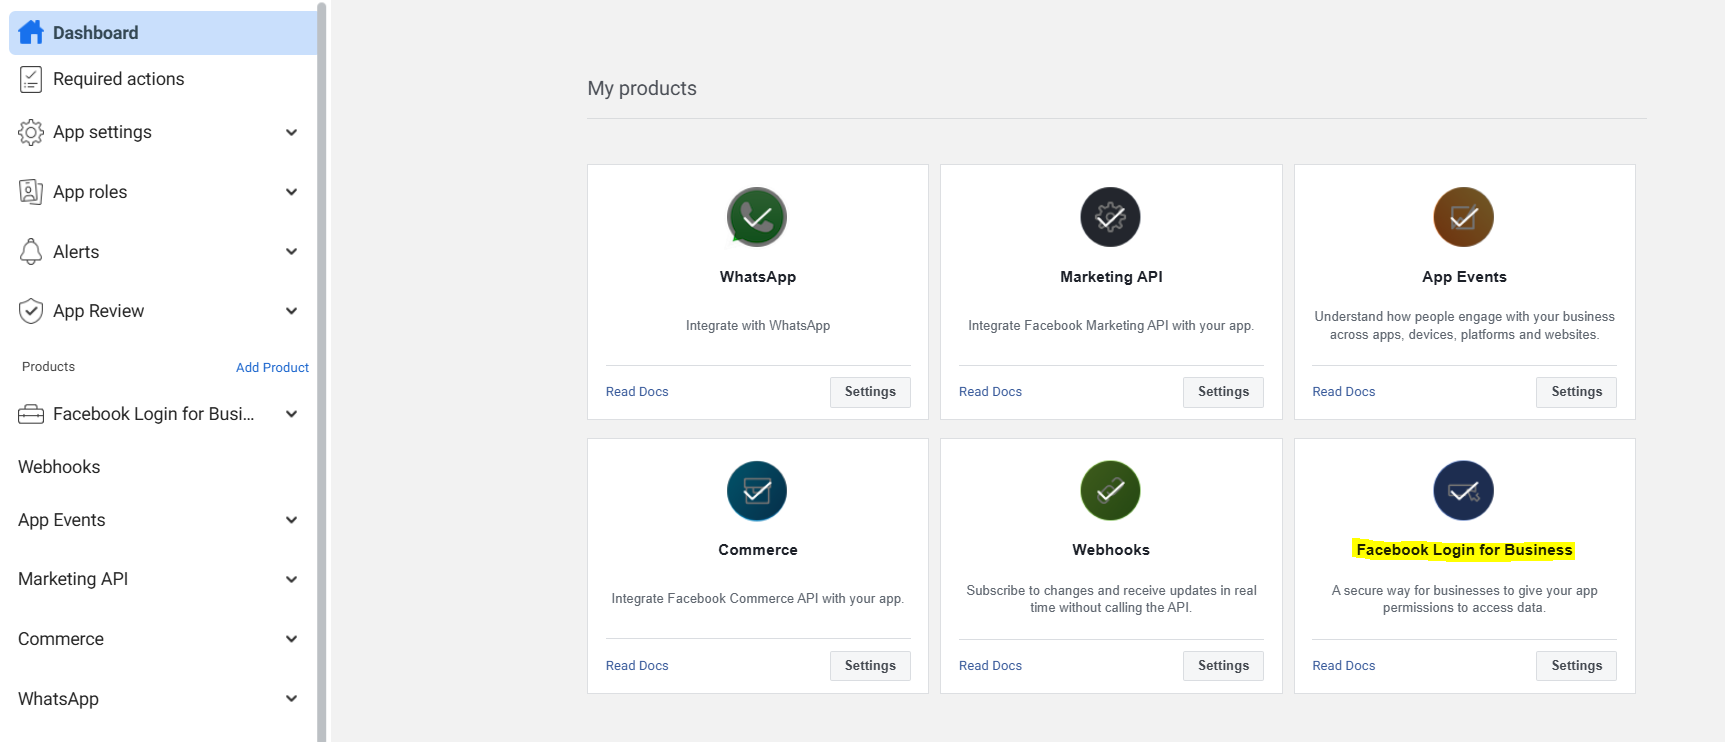
Ensure you have Facebook Login for Business enabled in your app, if not click on Dashboard and enable it
Head to Facebook Login for Business and select Configurations -> Create configuration
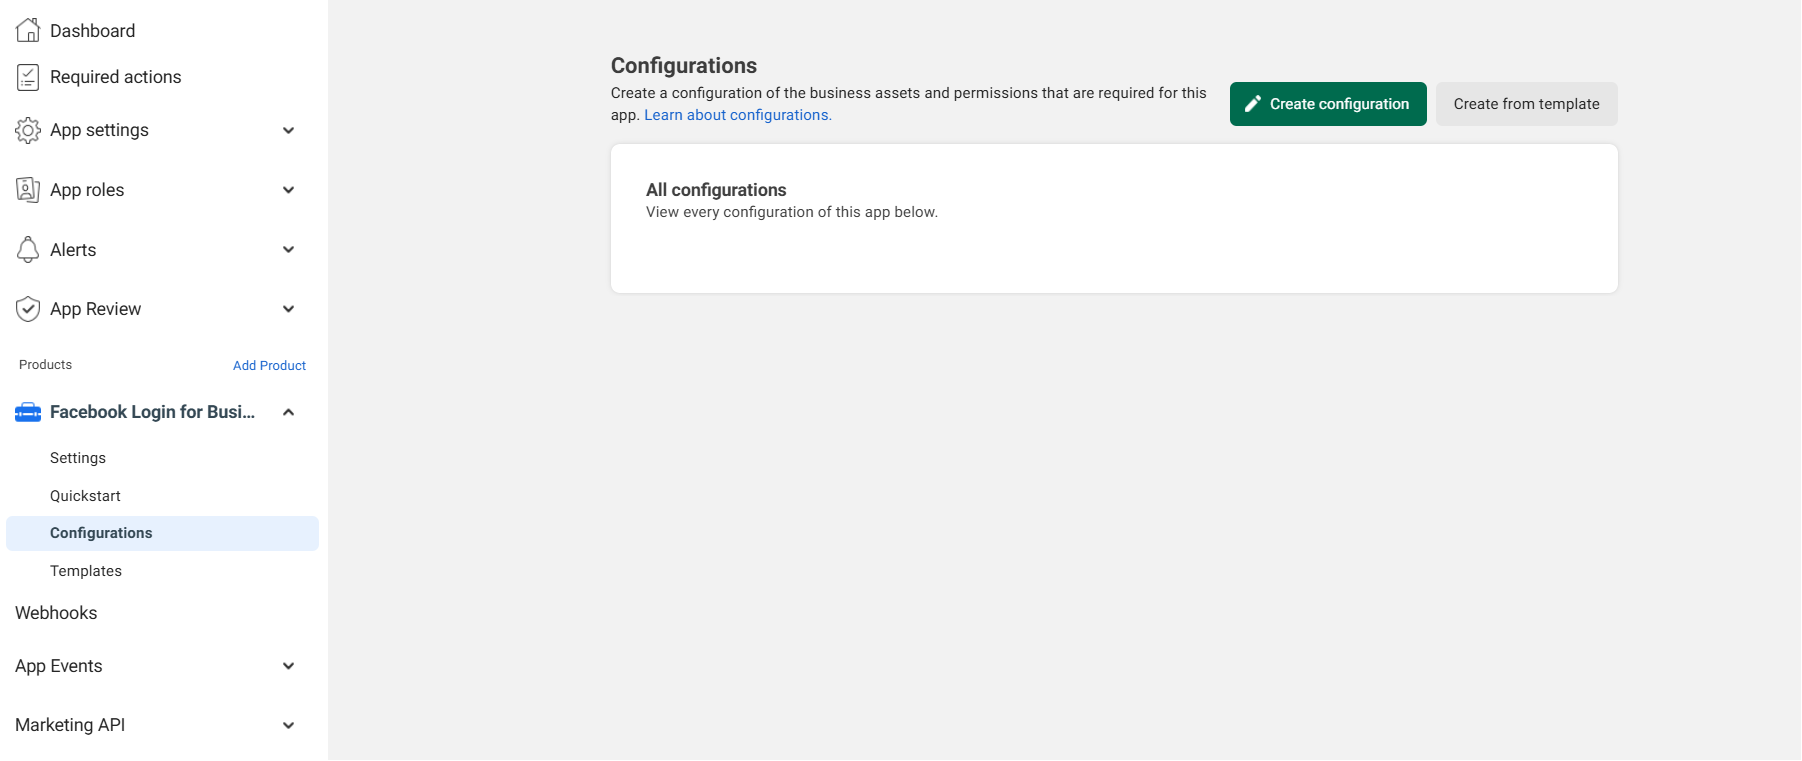
Add a Name to the configuration
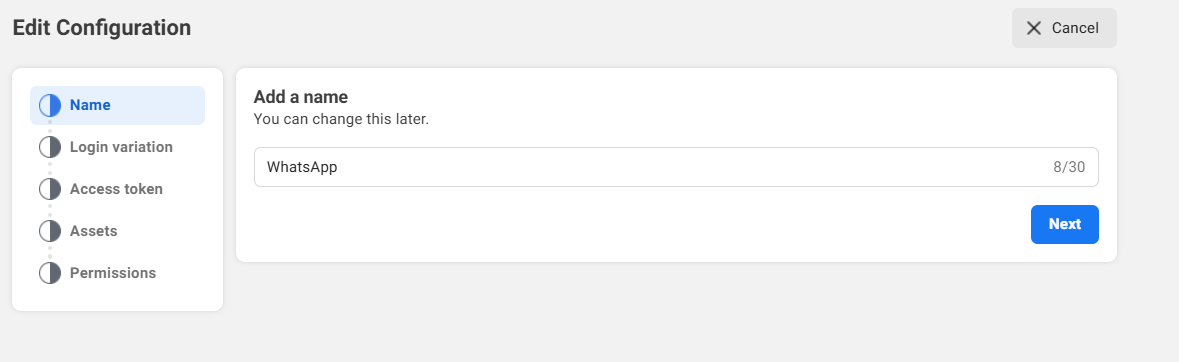
Select Login variation as WhatsApp Embedded Signup
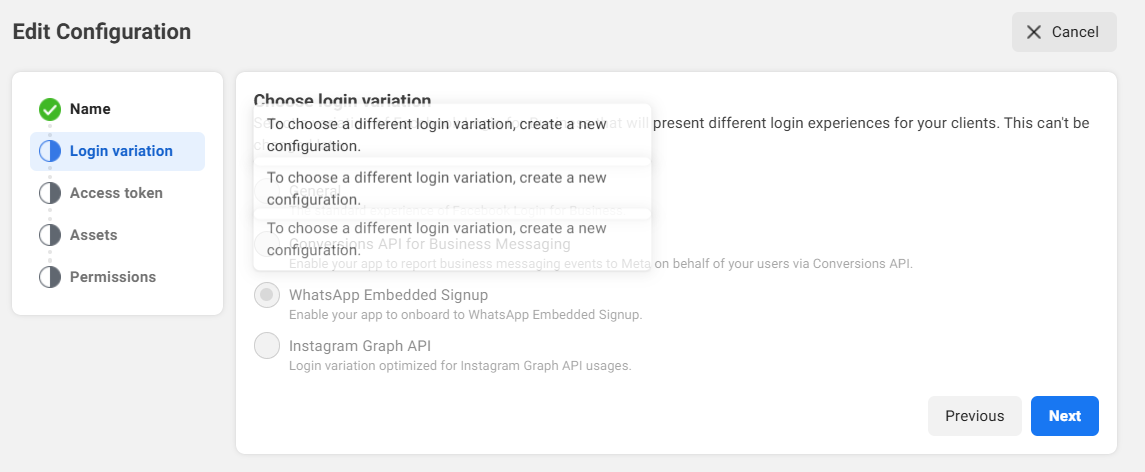
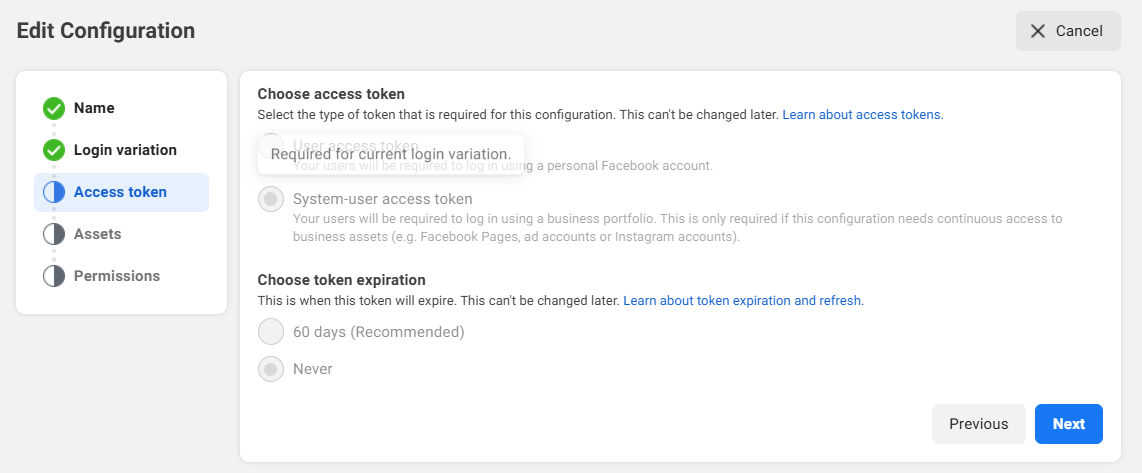
Select System-user Access Token & Never Expire
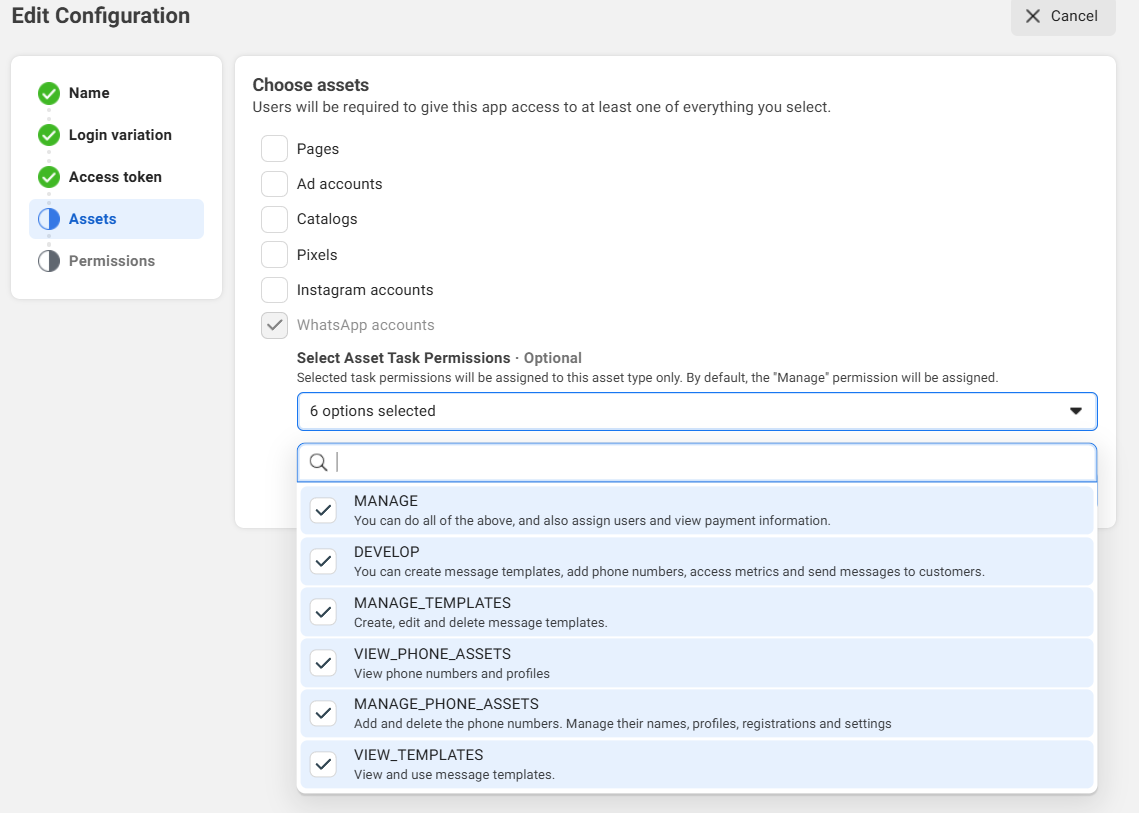
Select WhatsApp Accounts and Select all Asset Task Permissions
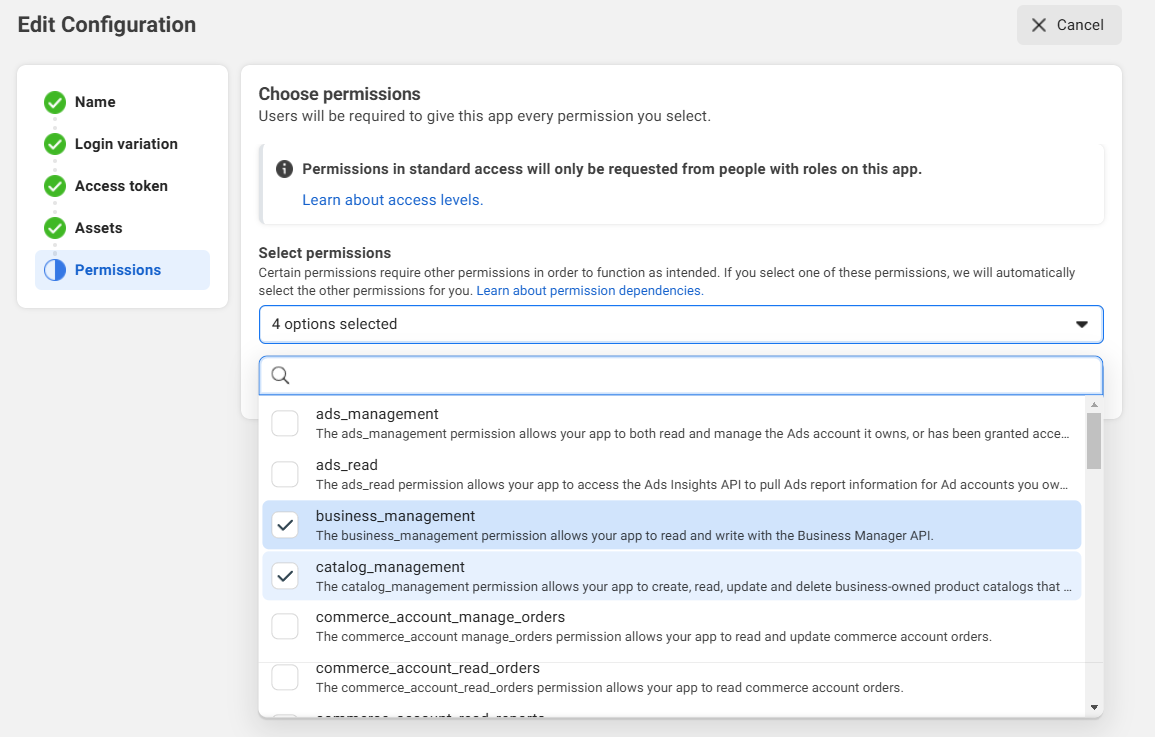
From Permssions select business_management, catalog_management, whataspp_business_management & whatsapp_business_messaggng
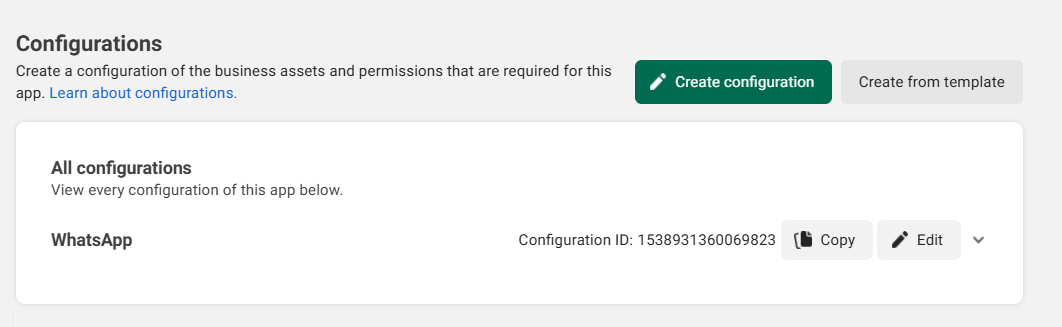
click Save to save the configuration
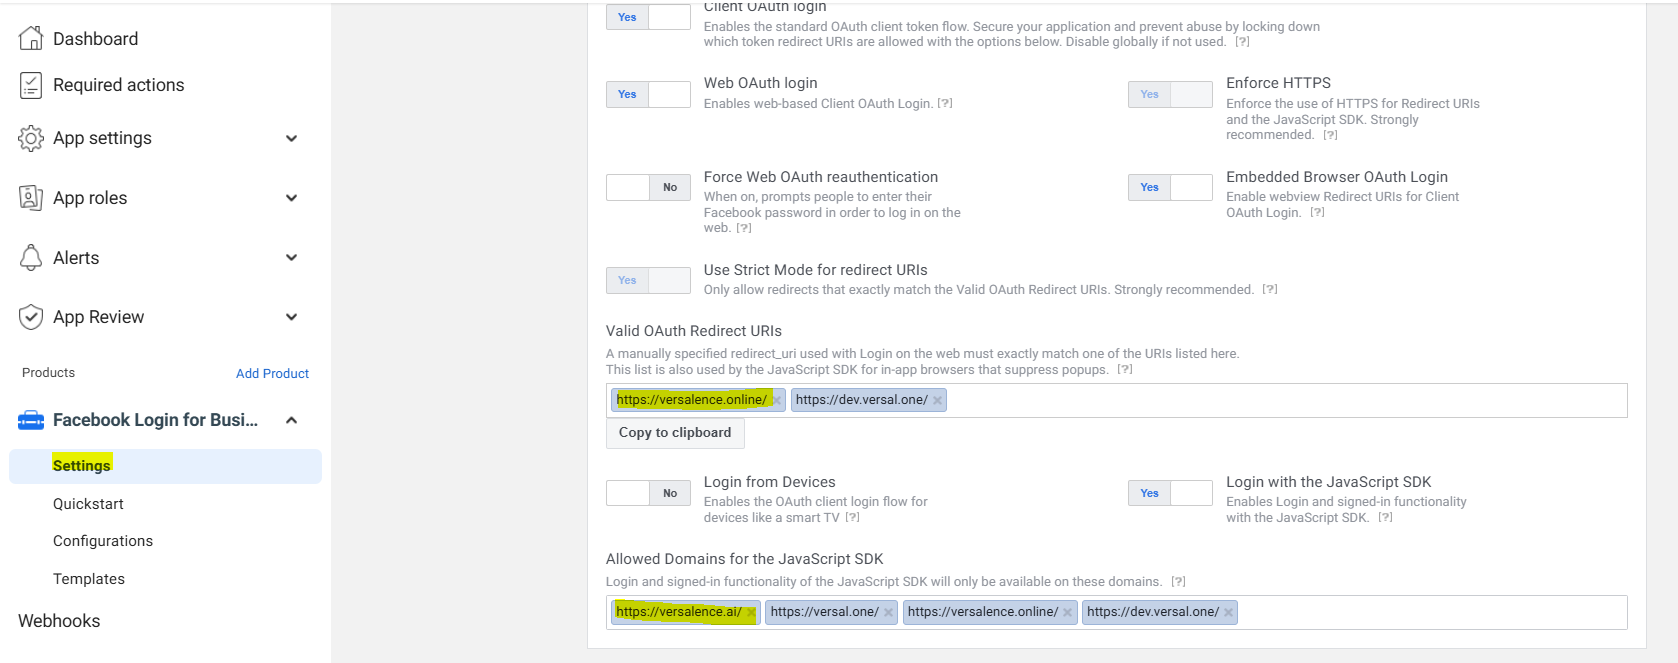
To whitelist the domains, head to settings and add the domains and ensure to enable Client OAuth Login, Web OAuth Login, Embedded Browser OAuth Login
Finally to embed the code you will need
- Configuration ID
- App ID
- App Secret
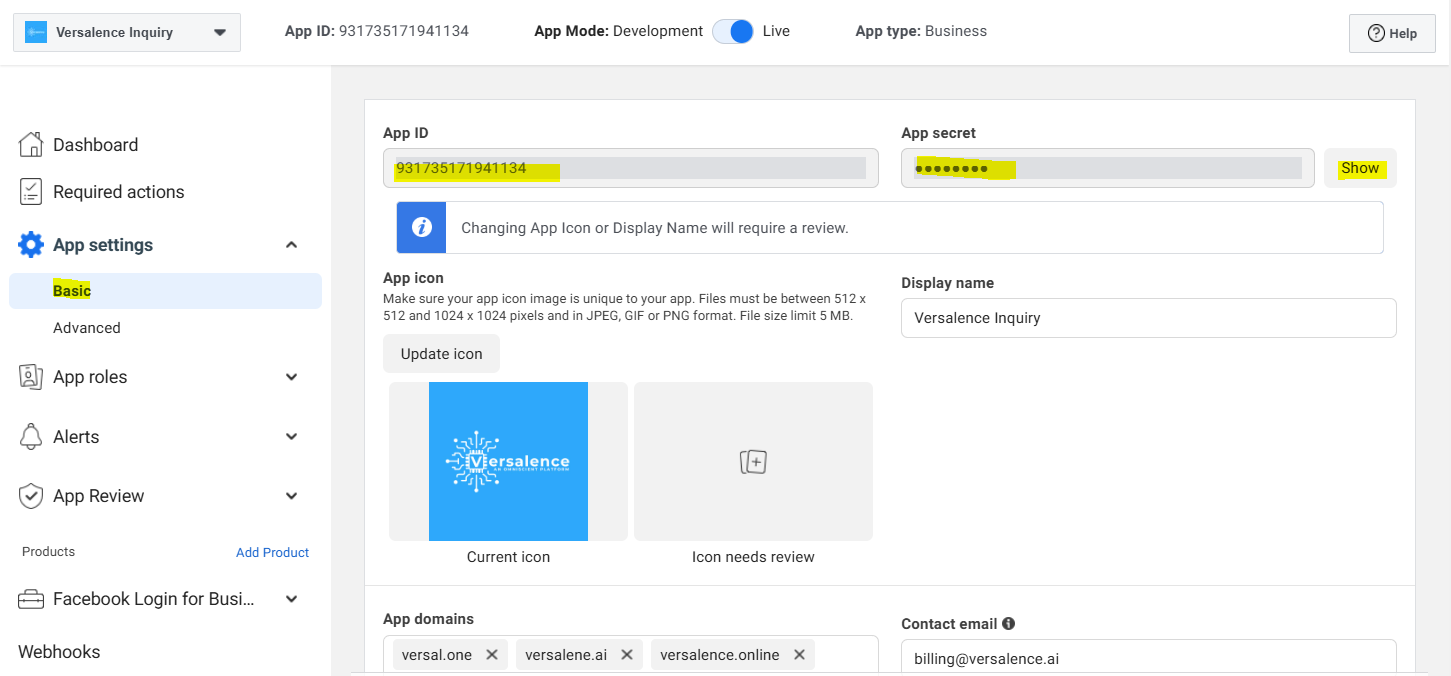
Configuration ID from the screen above. App ID and App secret from the screen below
Onboarding business customers as a Tech Provider or Tech Partner
This document describes the steps Tech Providers and Tech Partners must perform to onboard new business customers who have completed the Embedded Signup flow.
If you are a Tech Provider or Tech Partner, any business customer who completes your implementantation of the Embedded Signup flow will not be able to use your app to access their WhatsApp assets or send and receive messages (if you are offering messaging services) until you complete these steps.
What you will need
- the business customer's WABA ID (returned via session logging or API request)
- the business customer's business phone number ID (returned via session logging or API request)
- your app ID (displayed at the top of the App Dashboard)
- your app secret (displayed in the App Dashboard > App settings > Basic panel)
Also, if you wish to test messaging capabilities using the customer's business phone number, you will need a WhatsApp phone number that can already send and receive messages from other WhatsApp numbers.
Perform all of the requests described below using server-to-server requests. Do not use client-side requests.
Step 1: Exchange the token code for a business token
Use the GET /oauth/access_token endpoint to exchange the token code returned by Embedded Signup for a business integration system user access token ("business token").
Request
curl --get 'https://graph.facebook.com/v21.0/oauth/access_token' \
-d 'client_id=<APP_ID>' \
-d 'client_secret=<APP_SECRET>' \
-d 'code=<CODE>'
Request parameters
| Placeholder | Description | Example value |
|---|---|---|
|
|
Required. Your app ID. This is displayed at the top of the App Dashboard. |
|
|
|
Required. Your app secret. You can get this from the App Dashboard > App Secret > Basic panel. |
|
|
|
Required. The code returned by Embedded Signup when the customer successfully completed the flow. |
|
Response
Upon success:
<BUSINESS_TOKEN>
Response parameters
| Placeholder | Description | Example value |
|---|---|---|
|
|
The customer's business token. |
|
Step 2: Subscribe to webhooks on the customer's WABA
Use the POST /<WABA_ID>/subscribed_apps endpoint to subscribe your app to webhooks on the business customer's WABA. If you want the customer's webhooks to be sent to a different callback URL than the one set on your app, you have multiple webhook override options.
Request
curl -X POST 'https://graph.facebook.com/<API_VERSION>/<WABA_ID>/subscribed_apps' \
-H 'Authorization: Bearer <BUSINESS_TOKEN>'
Request parameters
| Placeholder | Description | Example value |
|---|---|---|
|
|
Required. The customer's business token. |
|
|
|
Required. The customer's WABA ID. |
|
Response
Upon success:
{
  "success": true
}
Step 3: Register the customer's phone number
Use the POST /<BUSINESS_PHONE_NUMBER_ID>/register endpoint to register the customer's business phone number for use with Cloud API.
Request
curl 'https://graph.facebook.com/v21.0/<BUSINESS_PHONE_NUMBER_ID>/register' \
-H 'Content-Type: application/json' \
-H 'Authorization: Bearer <BUSINESS_TOKEN>' \
-d '
{
  "messaging_product": "whatsapp",
  "pin": "<DESIRED_PIN>"
}'
Request parameters
| Placeholder | Description | Example value |
|---|---|---|
|
|
Required. The customer's business phone number ID returned. |
|
|
|
Required. The customer's business token. |
|
|
|
Required. Set this value to a 6-digit number. This will be the business phone number's two-step verification PIN. |
|
Response
Upon success:
{
  "success": true
}
Step 4: Send a test message
This step is optional.
If you wish to test the messaging capabilities of your business customer's business phone number, send a message to the customer's number from your own WhatsApp number (this will open a customer service window, allowing you to respond with any type of message).
Next, use the POST /<BUSINESS_PHONE_NUMBER_ID>/messages endpoint to send a text message in response.
Request
curl 'https://graph.facebook.com/v21.0/<BUSINESS_PHONE_NUMBER_ID>/messages' \
-H 'Content-Type: application/json' \
-H 'Authorization: Bearer <BUSINESS_TOKEN>' \
-d '
{
  "messaging_product": "whatsapp",
  "recipient_type": "individual",
  "to": "<WHATSAPP_USER_NUMBER>",
  "type": "text",
  "text": {
    "body": "<BODY_TEXT>"
  }
}'
Request parameters
| Placeholder | Description | Example value |
|---|---|---|
|
|
Required. Message body text. Supports URLs. Maximum 4096 characters. |
|
|
|
Required. The customer's business phone number ID. |
|
|
|
Reqiured. The customer's business token. |
|
|
|
Required. Your WhatsApp phone number that can send and receive messages from other WhatsApp numbers. Note that this cannot be a business phone number already registered for use with Cloud API or On-Premises API. |
|
Response
Upon success:
{
  "messaging_product": "whatsapp",
  "contacts": [
    {
      "input": "<WHATSAPP_USER_NUMBER>",
      "wa_id": "<WHATSAPP_USER_ID>"
    }
  ],
  "messages": [
    {
      "id": "<WHATSAPP_MESSAGE_ID>"
    }
  ]
}
Response parameters
| Placeholder | Description | Example value |
|---|---|---|
|
|
WhatsApp message ID. |
|
|
|
Your WhatsApp user ID. |
|
|
|
Your WhatsApp phone number that the message was sent to. |
|
If you were able to successfully send and receive messages using the customer's business phone number, and if messages webhooks were triggered describing the initial message that you sent, as well as the delivery statuses of the message you sent in response, the customer's business phone number is working properly.
Step 5: Instruct the customer to add a payment method
Instruct your customer to use the WhatsApp Manager to add a payment method. You can provide them with the following Help Center link:
https://www.facebook.com/business/help/488291839463771
Alternatively, you can instruct them to:
- Access the WhatsApp Manager > Overview panel at https://business.facebook.com/wa/manage/home/
- Click the Add payment method button
- Complete the flow
Once your customer adds a payment method, they are fully onboarded onto the WhatsApp Business Platform and can begin using your app to access their WhatsApp assets and send and receive messages (if you are providing them with that service).
WhatsApp API Calls - Inbound
Versalence currently provides WhatsApp call feature for incoming calls
To enable WhatsApp Service, you need to subscribe to WhatsApp Calling Service
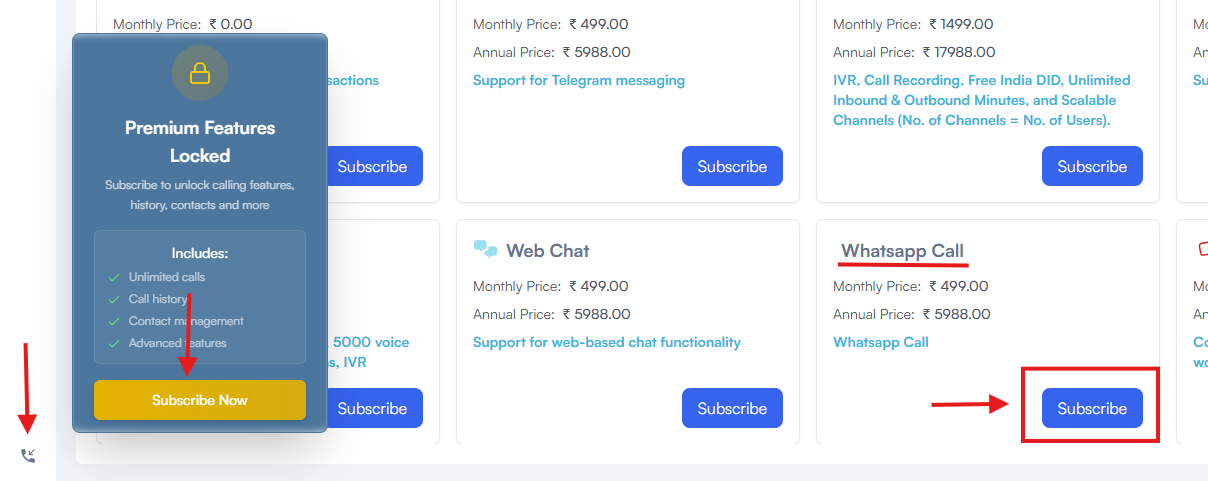
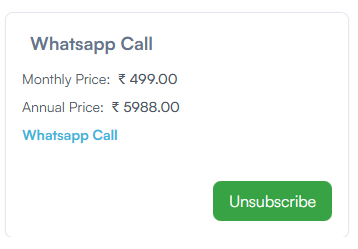
once the payment is completed - your subscription will be active
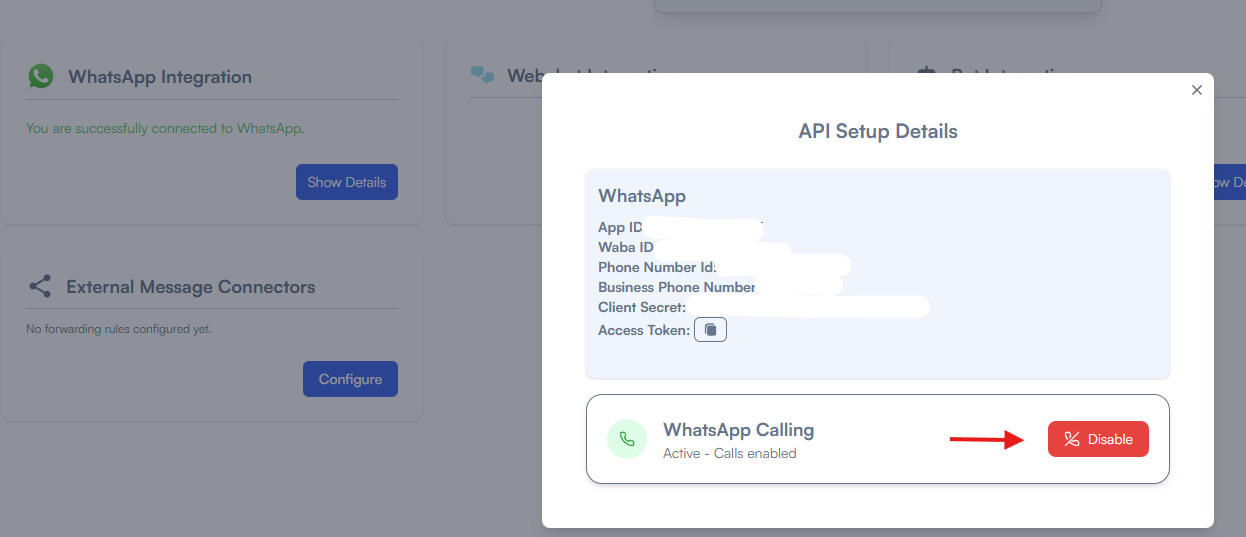
In Integrations -> WhatsApp Integration -> WhatsApp Calling features will be enabled - you can enable or disable this service from here
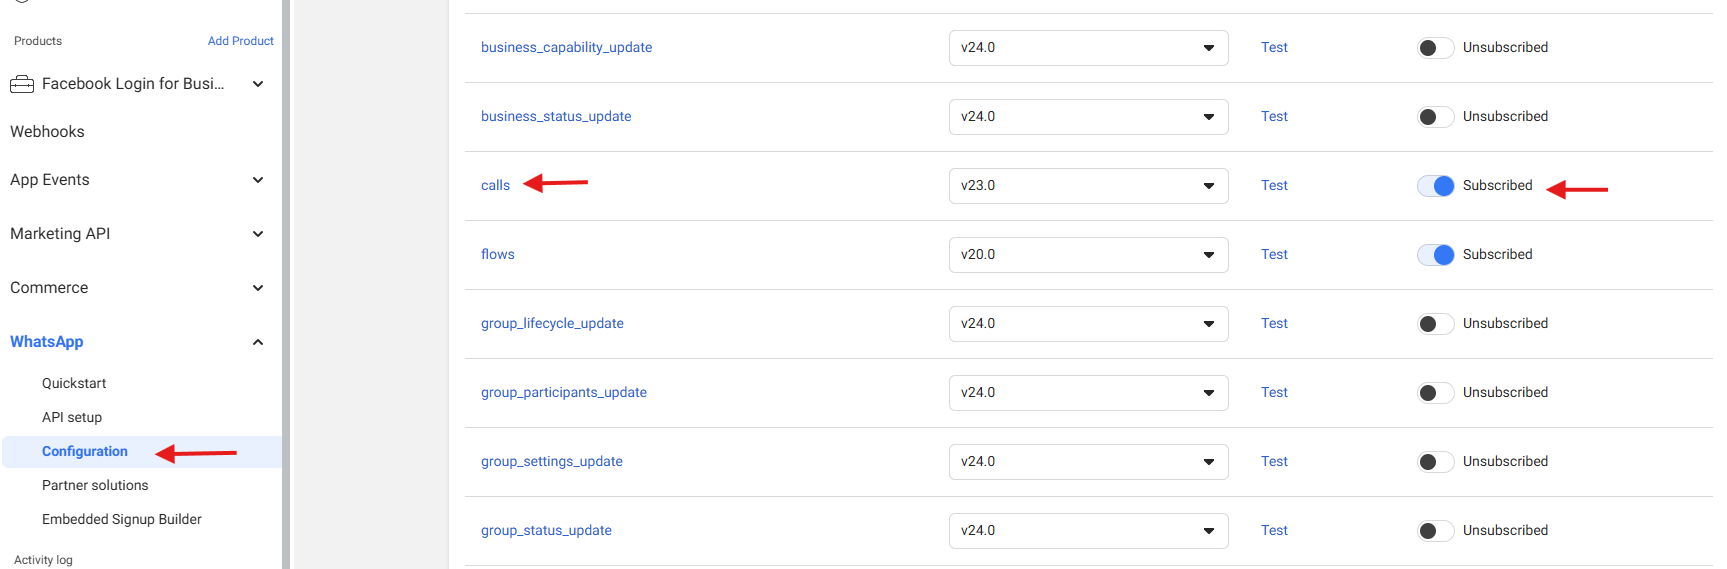
If you have not setup WhatsApp with vCX usign our embedded signup, the process will differ as you have to perform the adddtional step below
you have to goto https://developers.facebook.com/apps/ open the app that is linked with vCX, once inside the page, under WhatsApp Settings select Configuration and enable calls as shown below